| Prerequisites |
|---|
| Google Workspace Admin account with access to Google Cloud Console |
| Permissions to create OAuth credentials |
This guide walks you through the process of creating an OAuth 2.0 client ID in Google Cloud Console, which is required to enable integration with Google Workspace Client-Side Encryption (CSE). You’ll generate credentials, configure redirect URIs, and prepare the client ID for integration with FlowCrypt Workspace Key Manager.
1. Open Google Cloud Console
Visit https://console.cloud.google.com/ and sign in with your Google account.
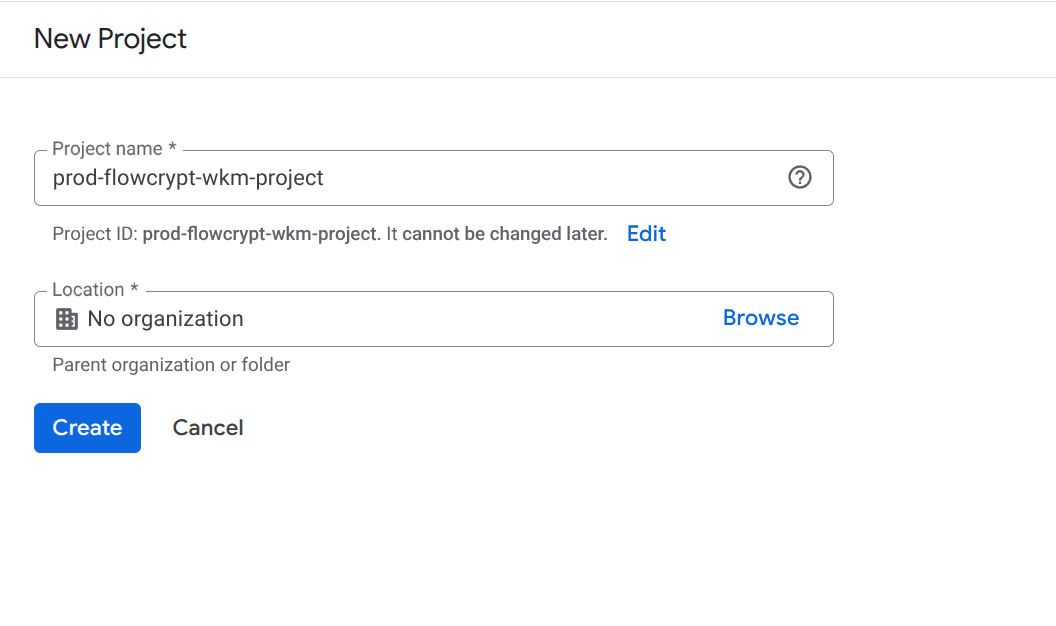
2. Create a New Google Cloud Project
- Go to the Manage resources page in the Google Cloud console.
- Click Create project in the top bar.
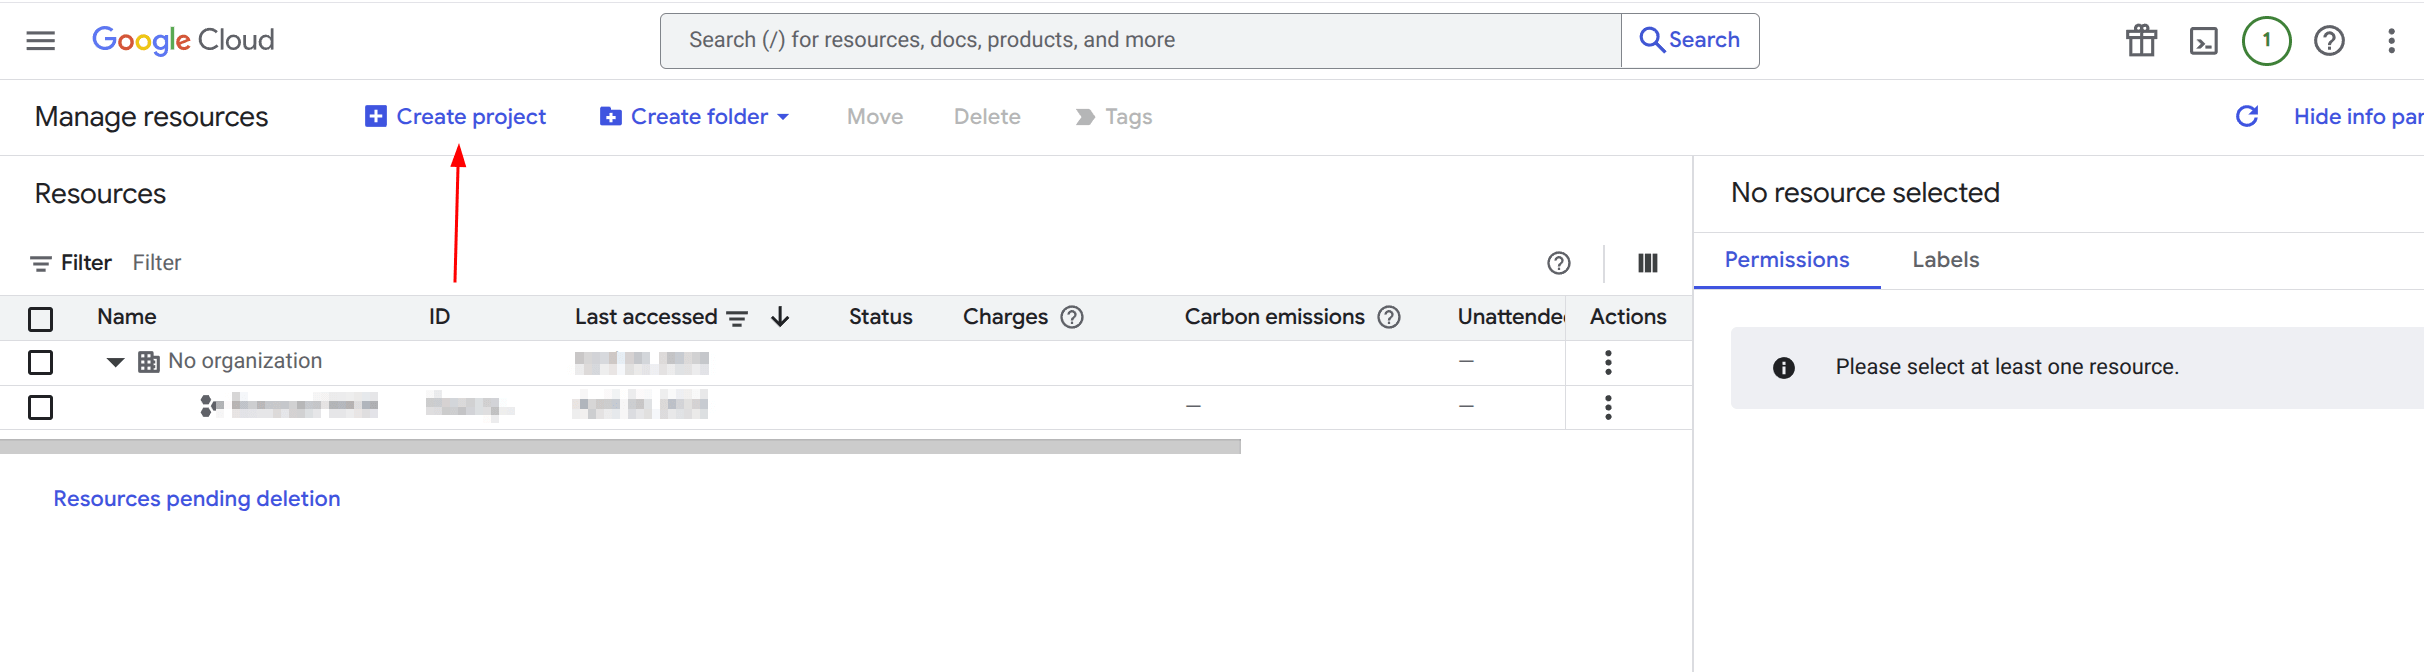
- Enter a project name (for example, “FlowCrypt WKM”) and choose it’s location.
- Click Create.
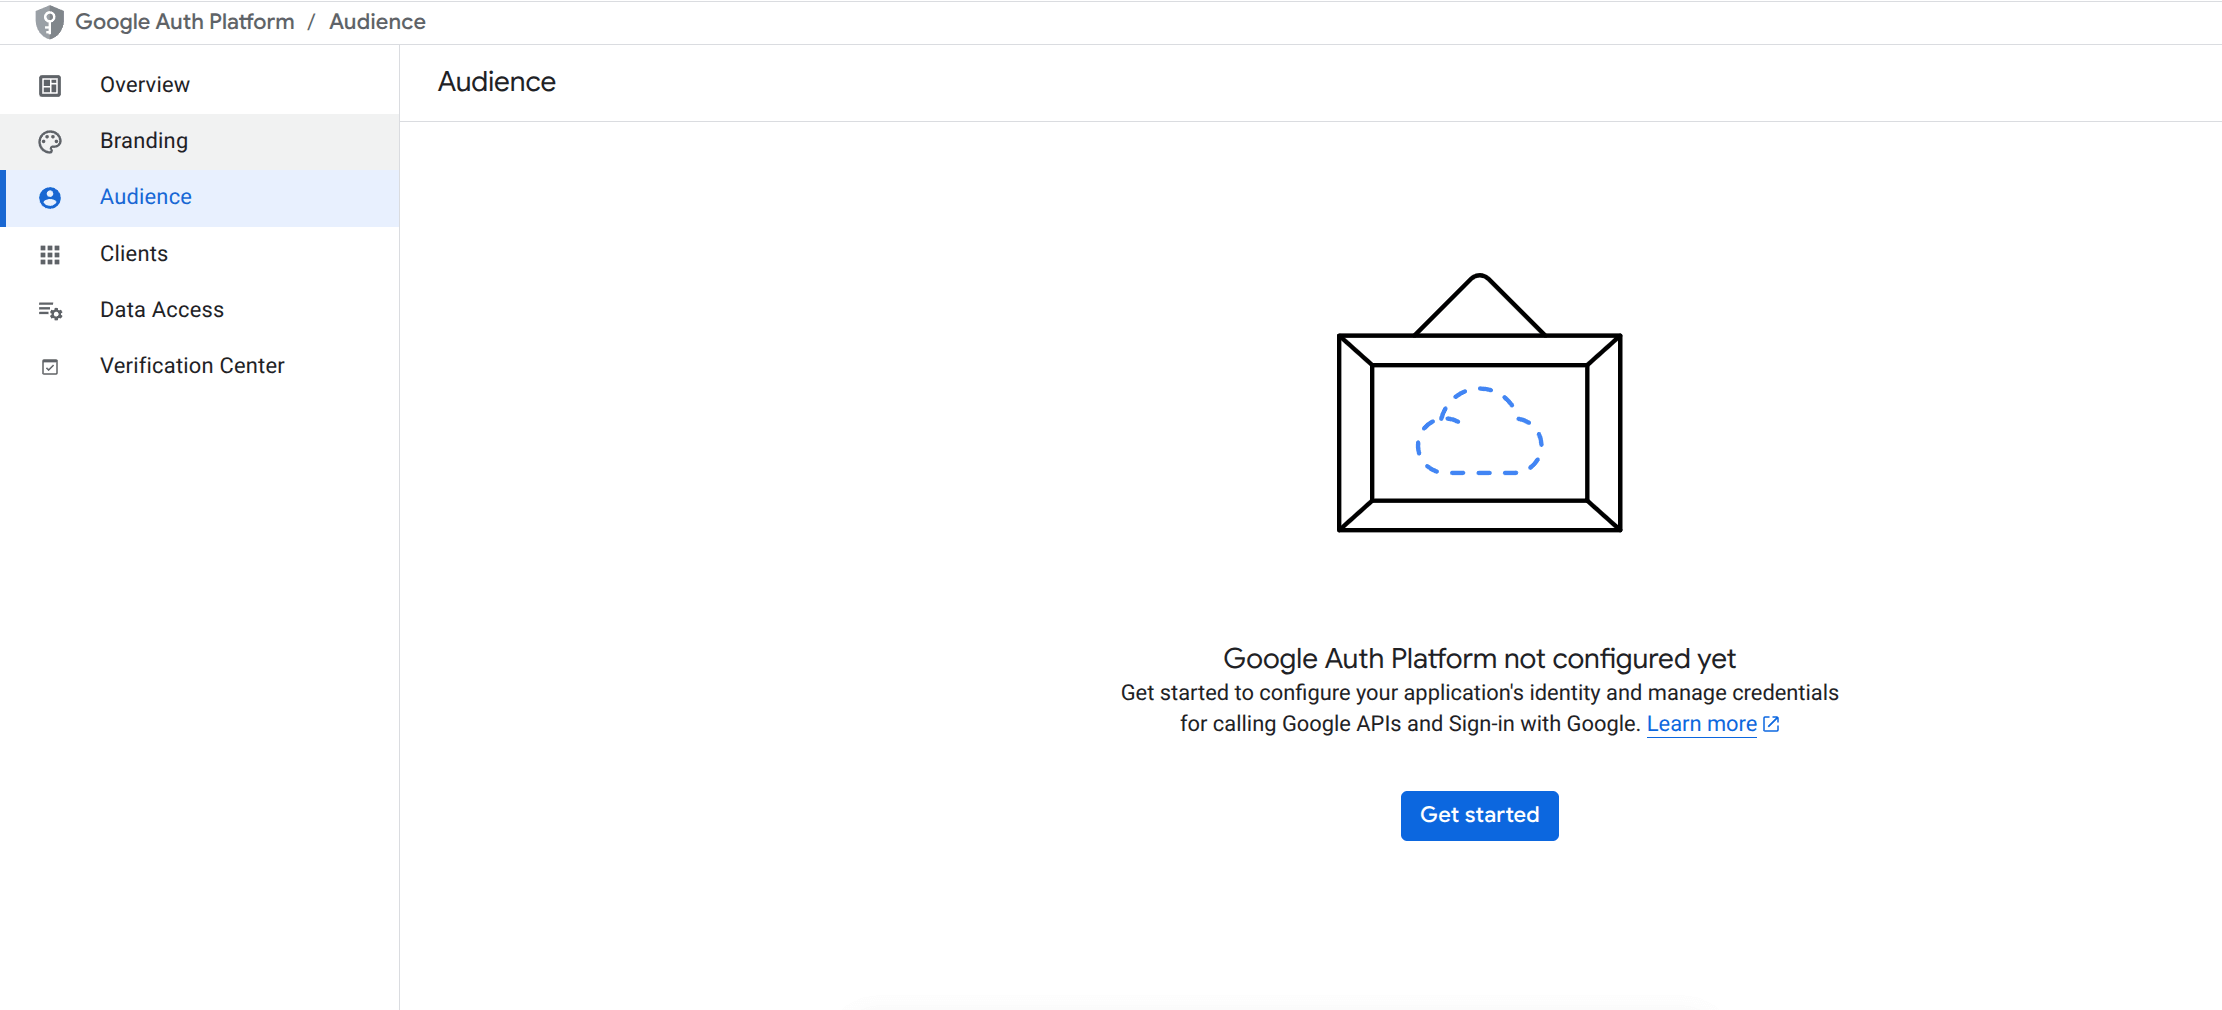
3. Configure the OAuth Consent Screen
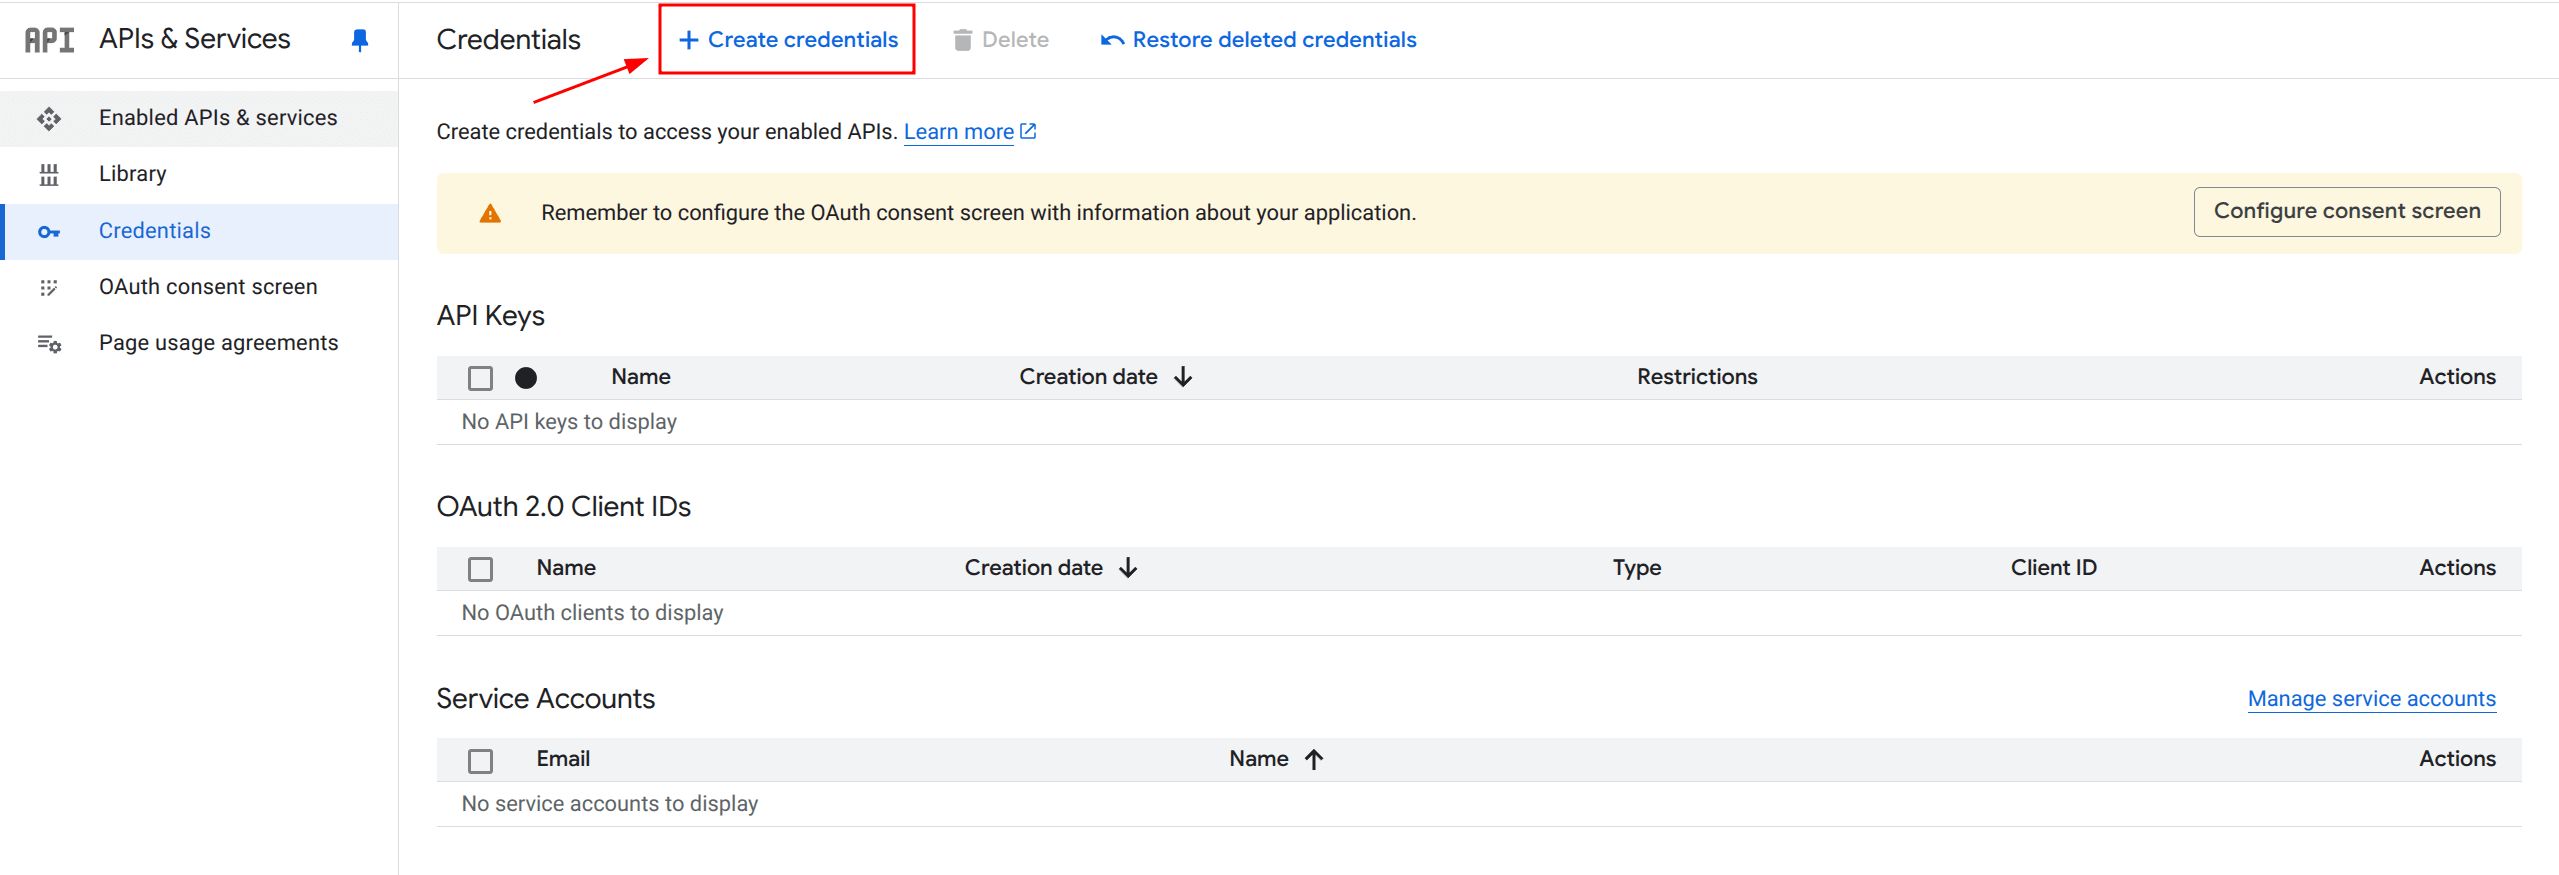
If you haven’t configured the OAuth consent screen for your app yet, you’ll see the following reminder message. Skip this step if you have already configured the OAuth consent screen.
Click on Configure consent screen.

You’ll see the message Google Auth Platform not configured yet — click on Get Started.
- Set App Name to FlowCrypt WKM and User Support Email to your support email address.
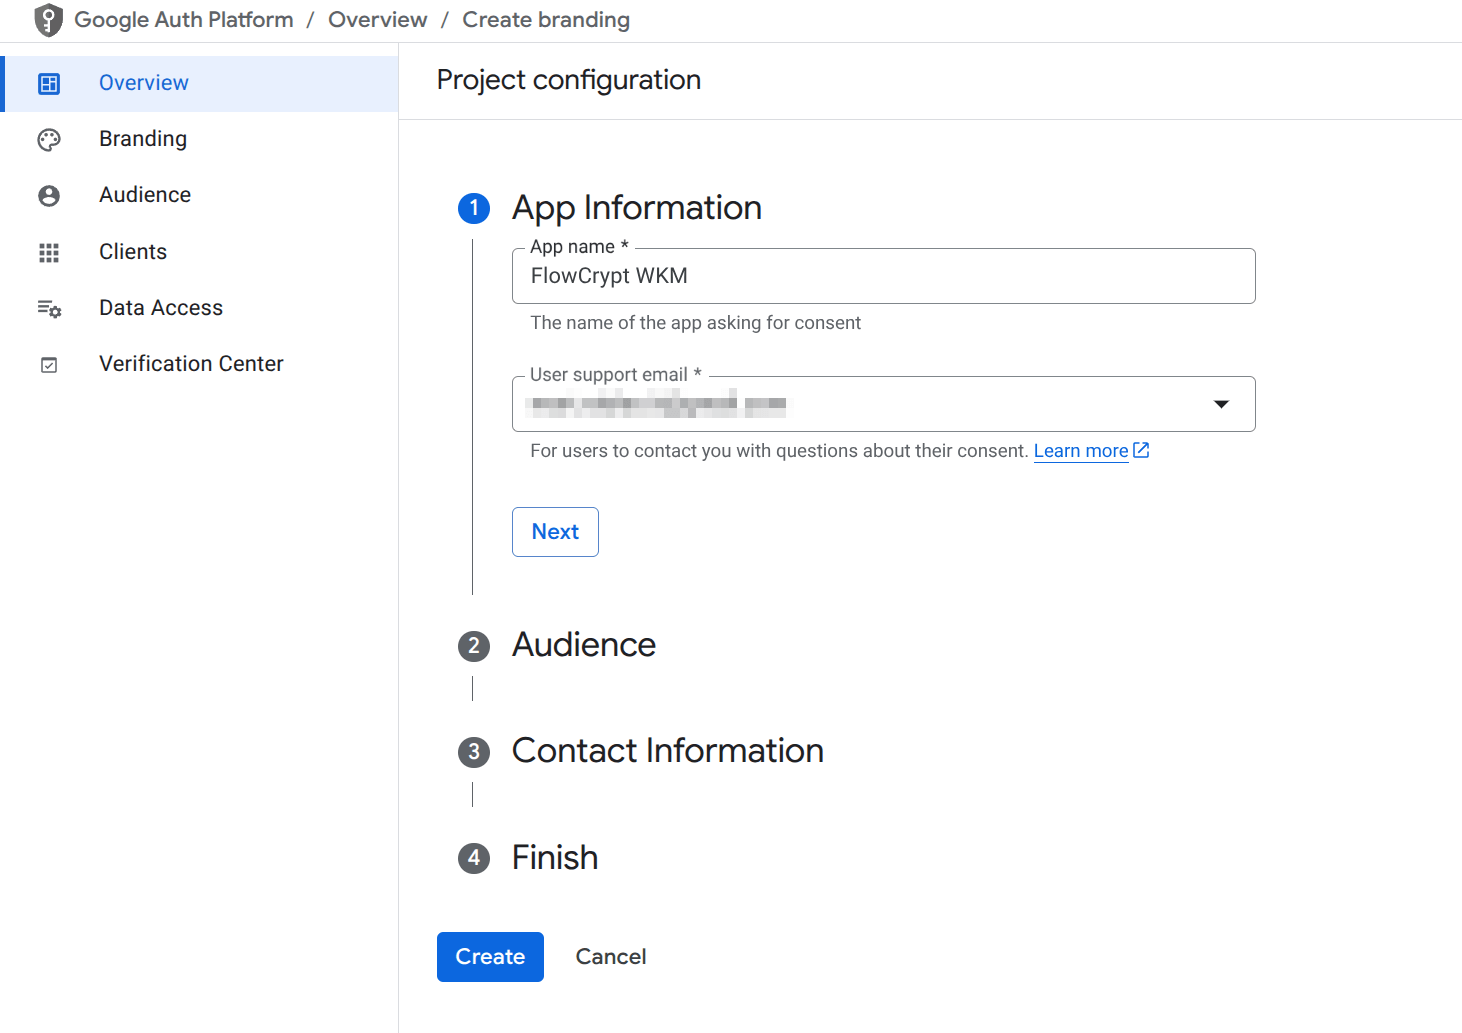
- Set Audience to Internal.
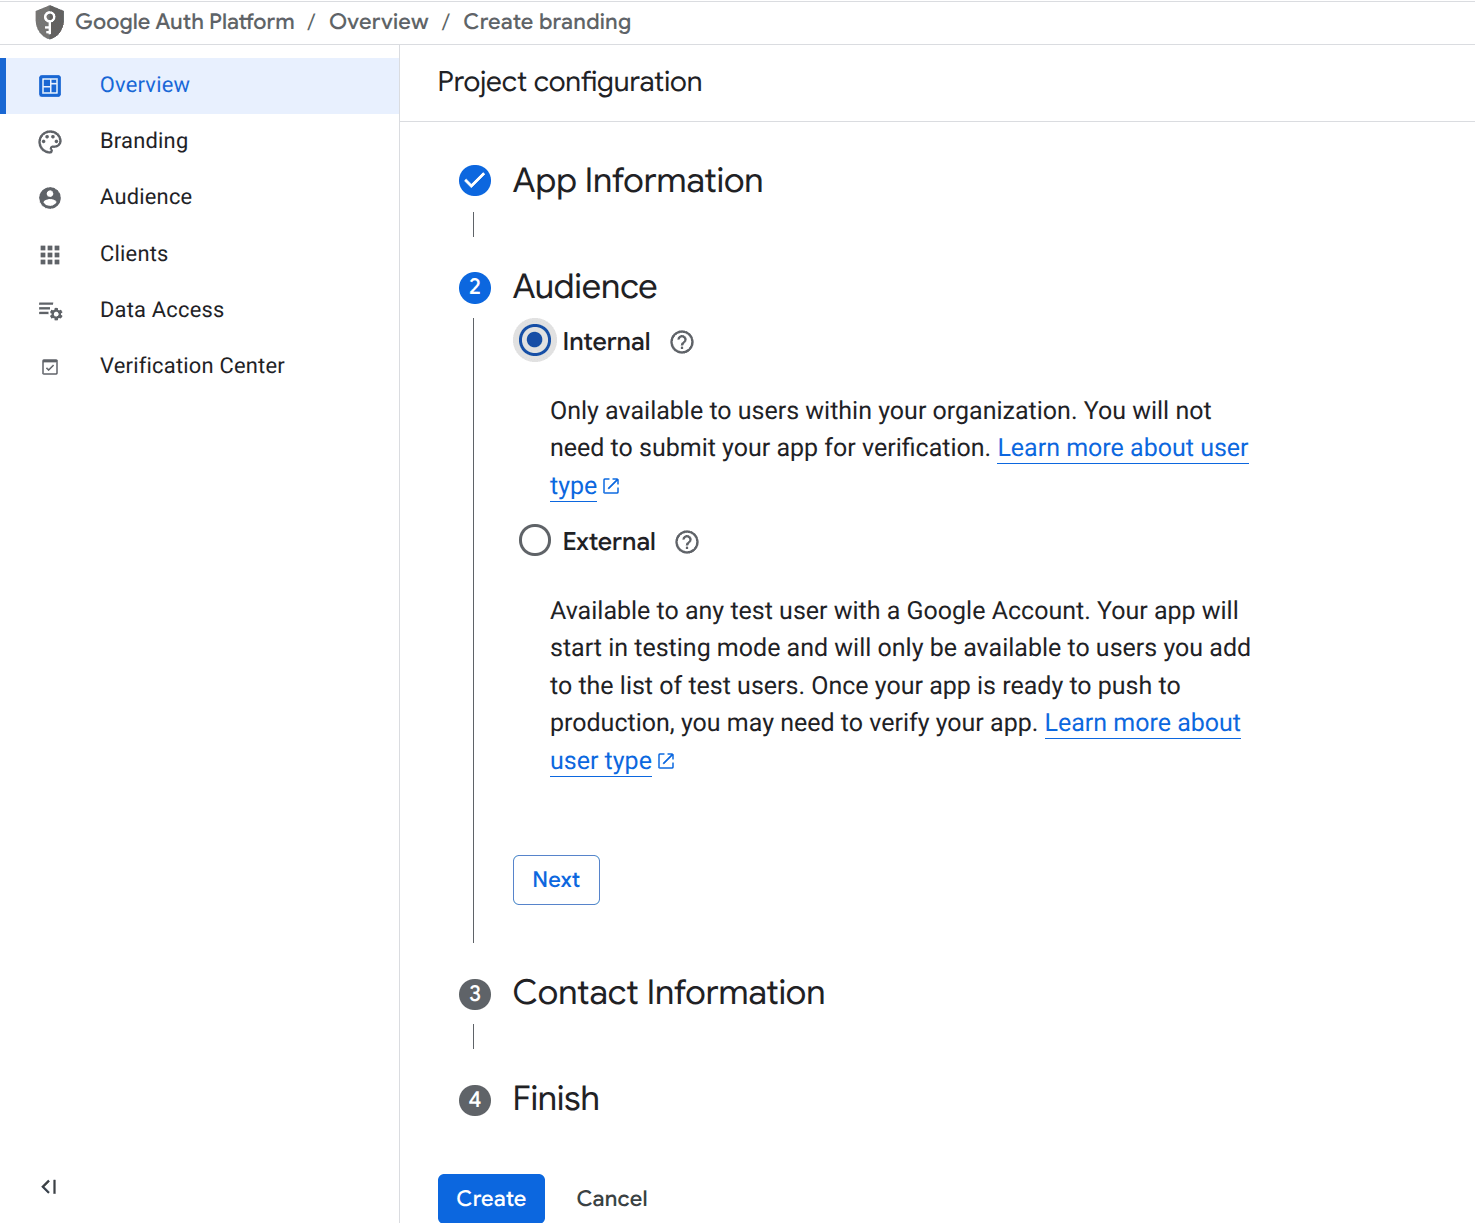
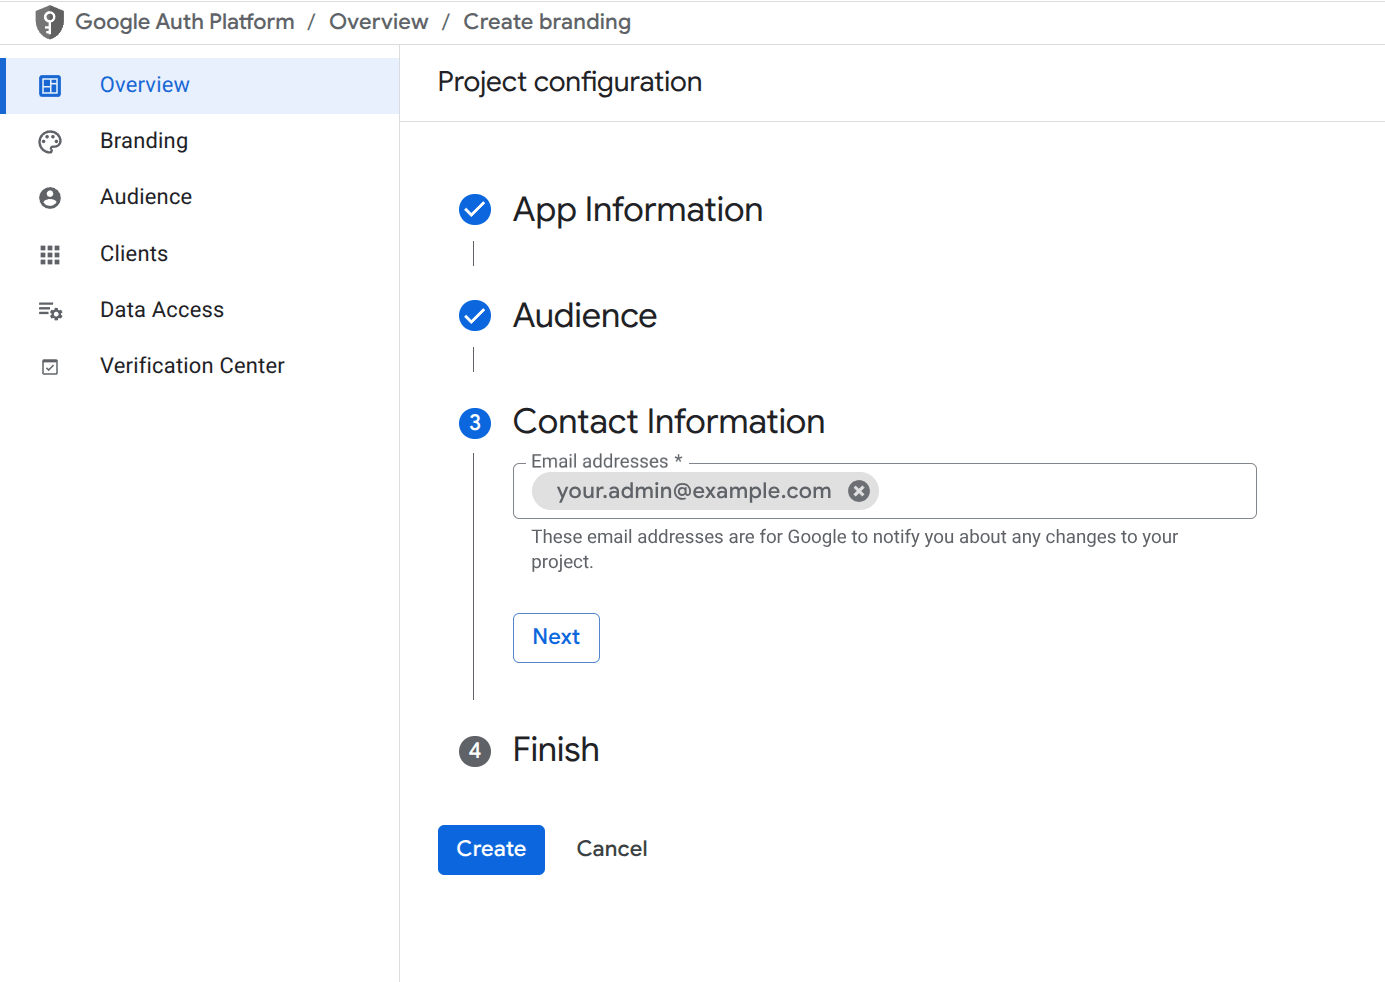
- Set Contact Information to your organization’s admin email.
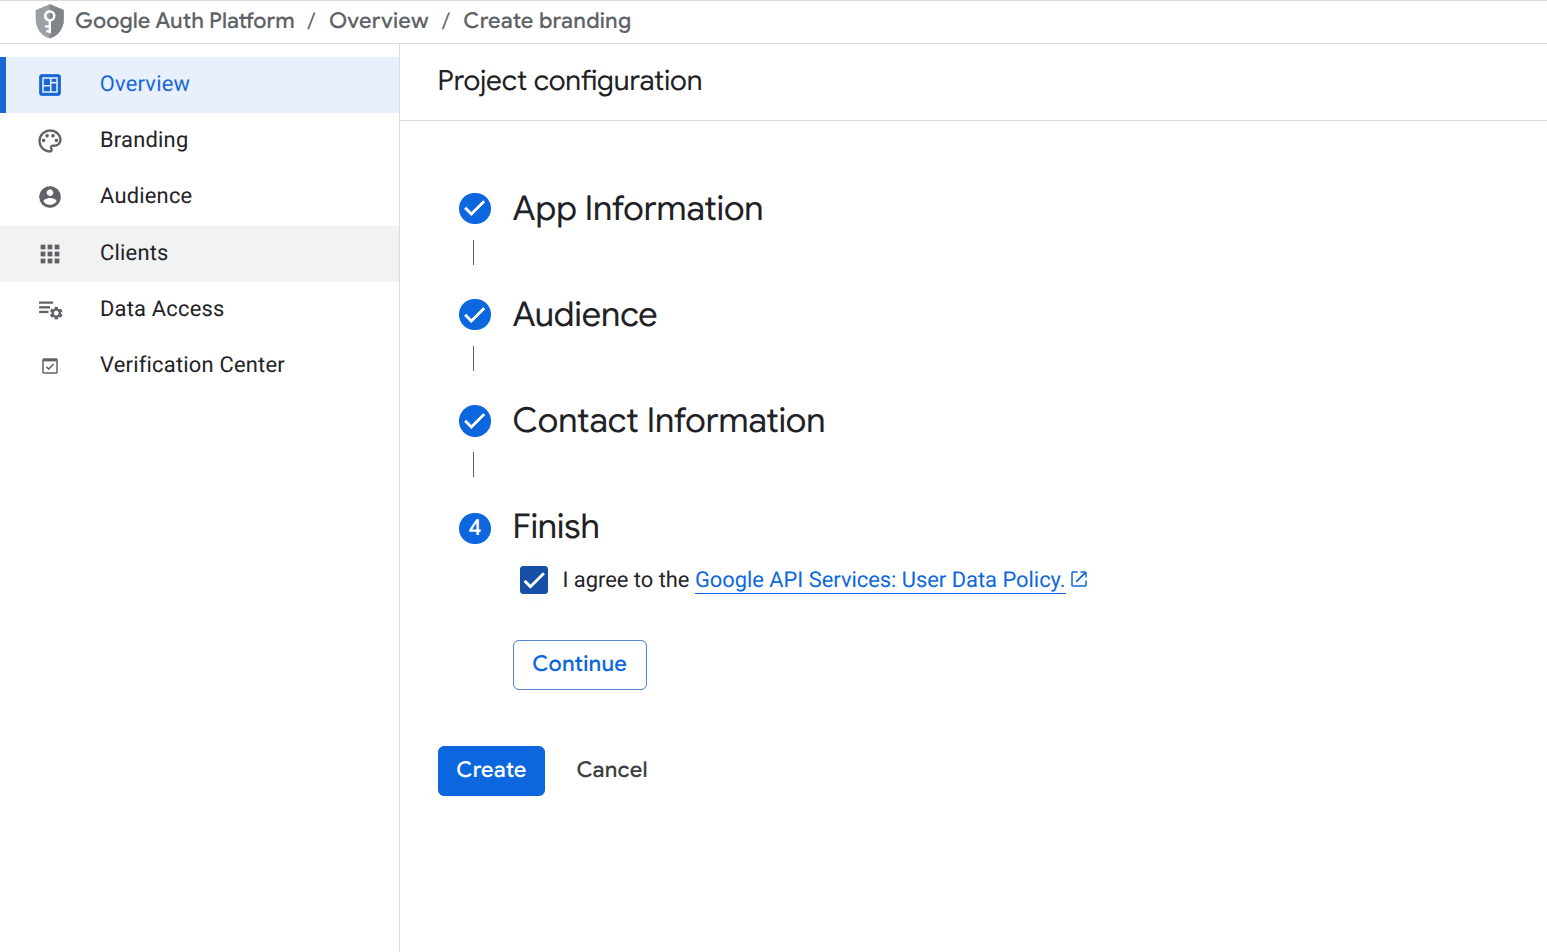
- Agree to the Google API Services User Data Policy.
- Click Create to finish setting up the consent screen for your OAuth app.
4. Navigate to Credentials Section
- Open the side menu.
- Go to APIs & Services → Credentials.

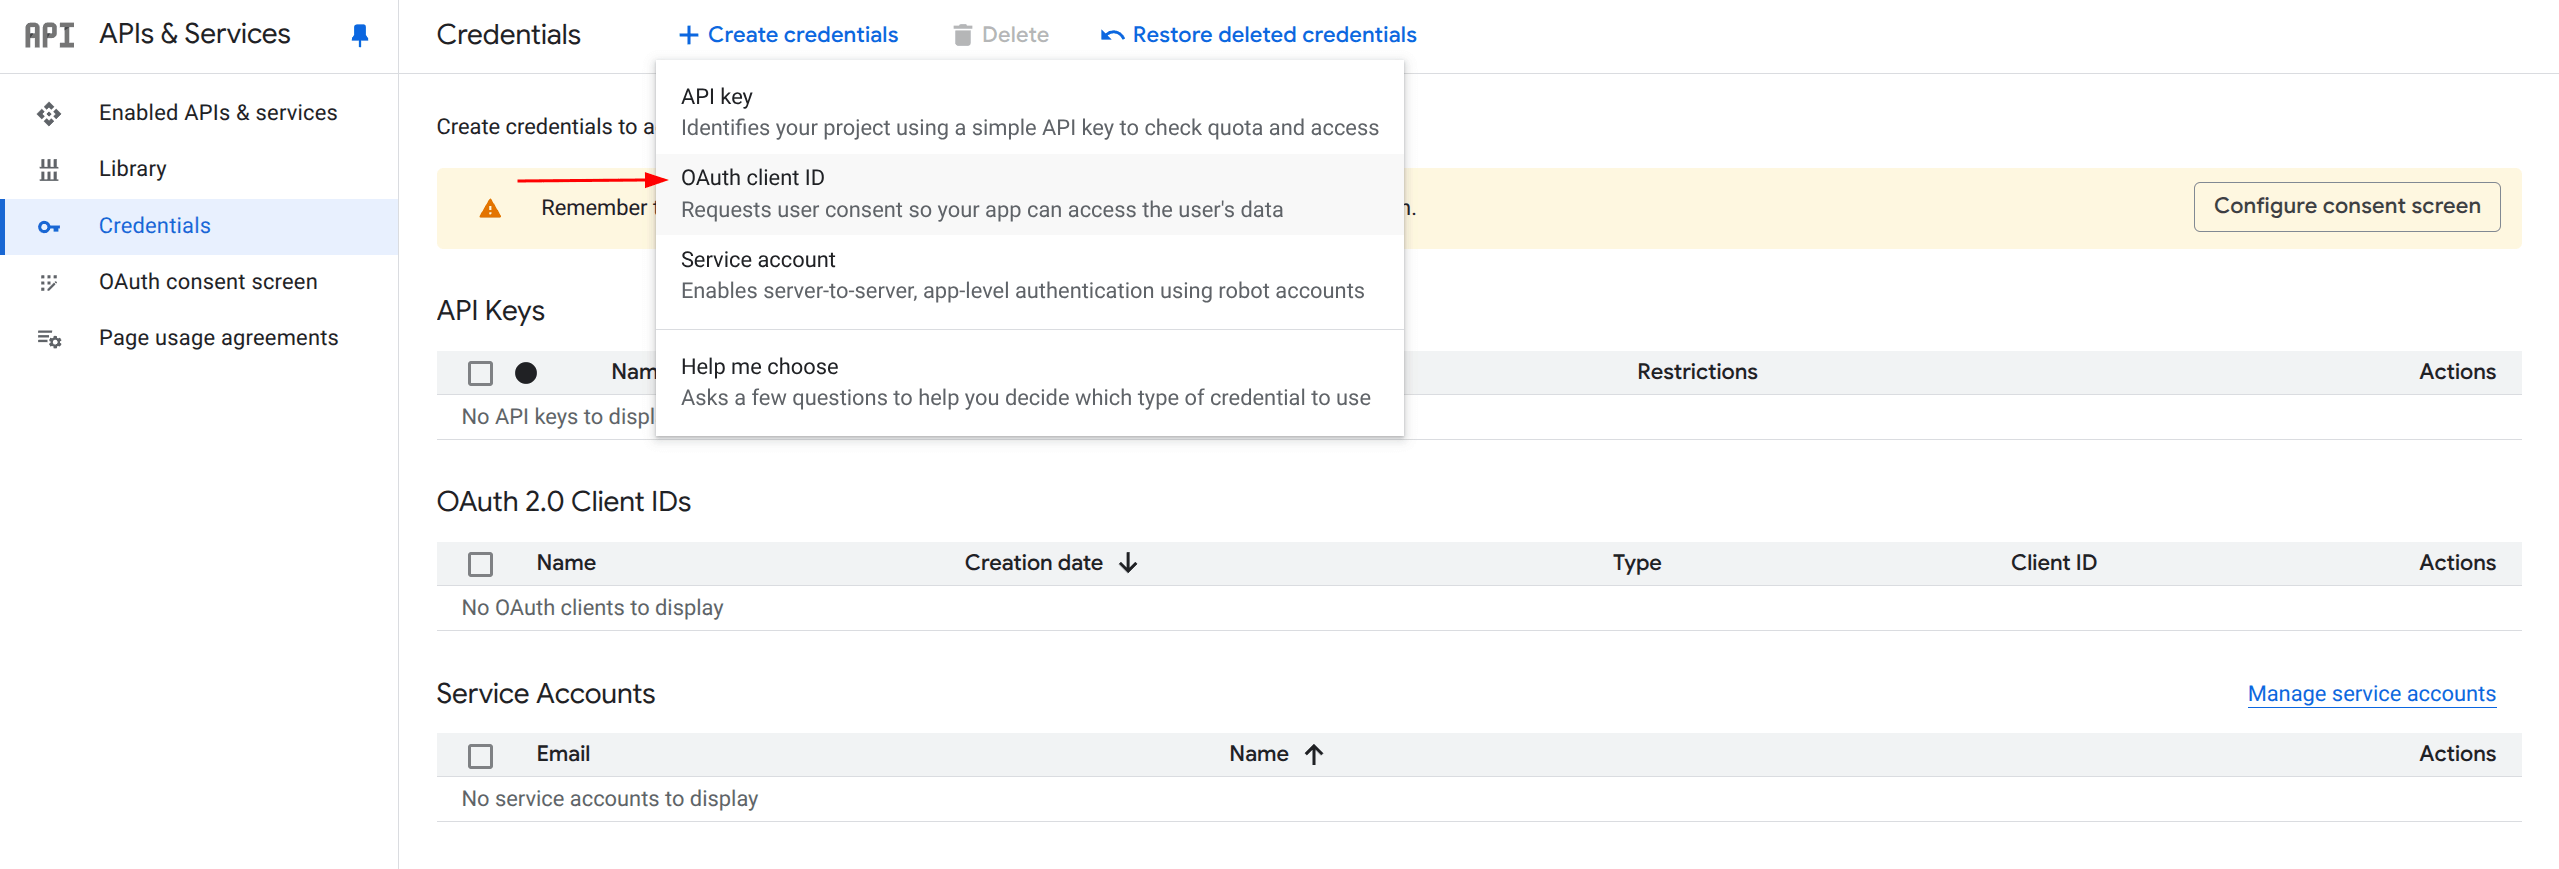
5. Create a New OAuth 2.0 Client ID
Click on the + Create Credentials button and select OAuth client ID.
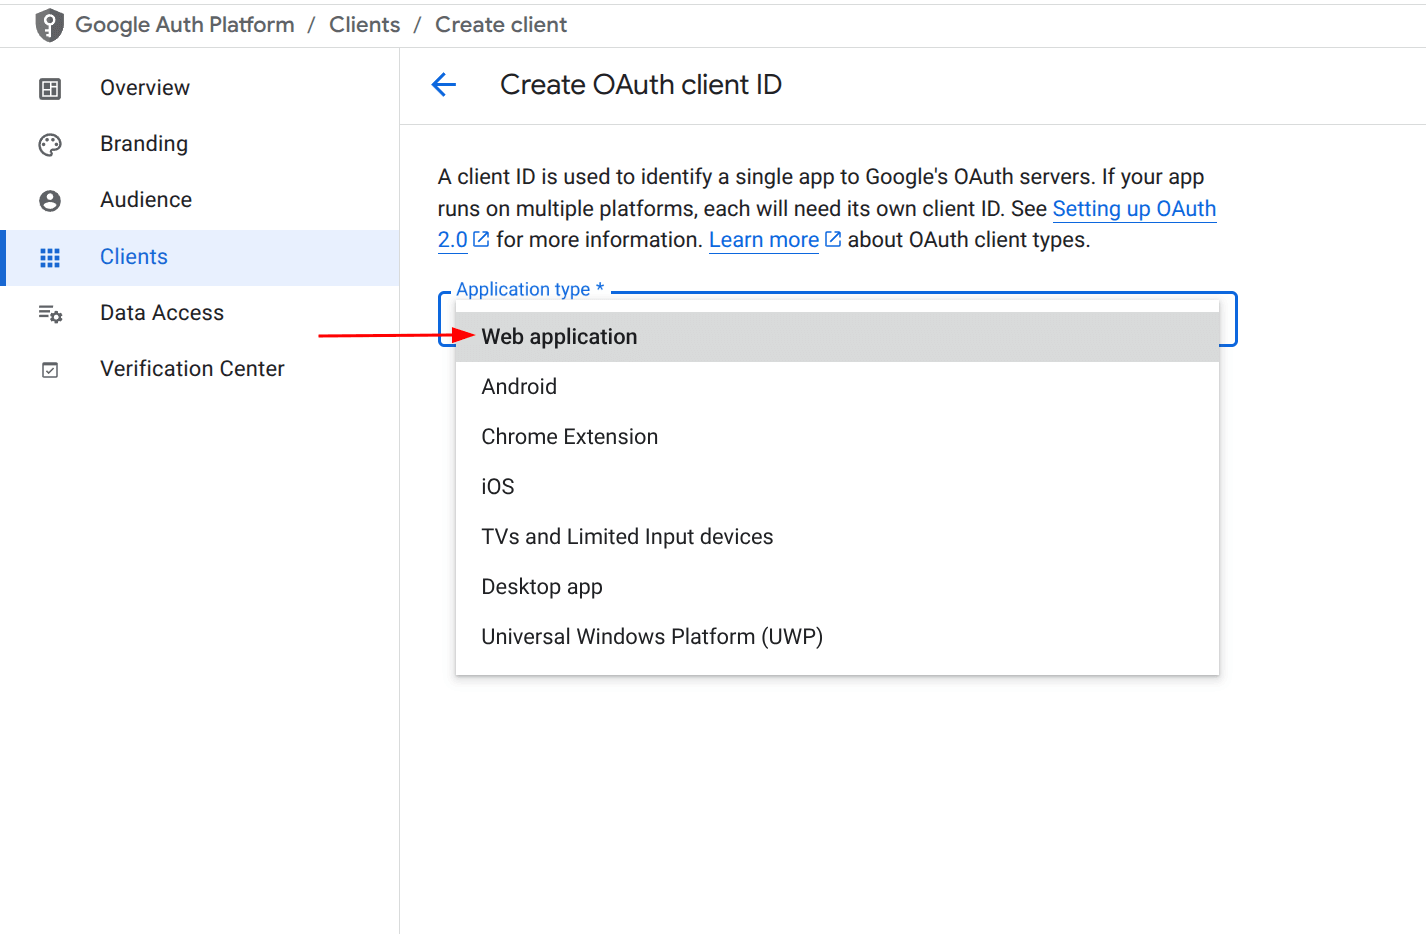
6. Choose Application Type
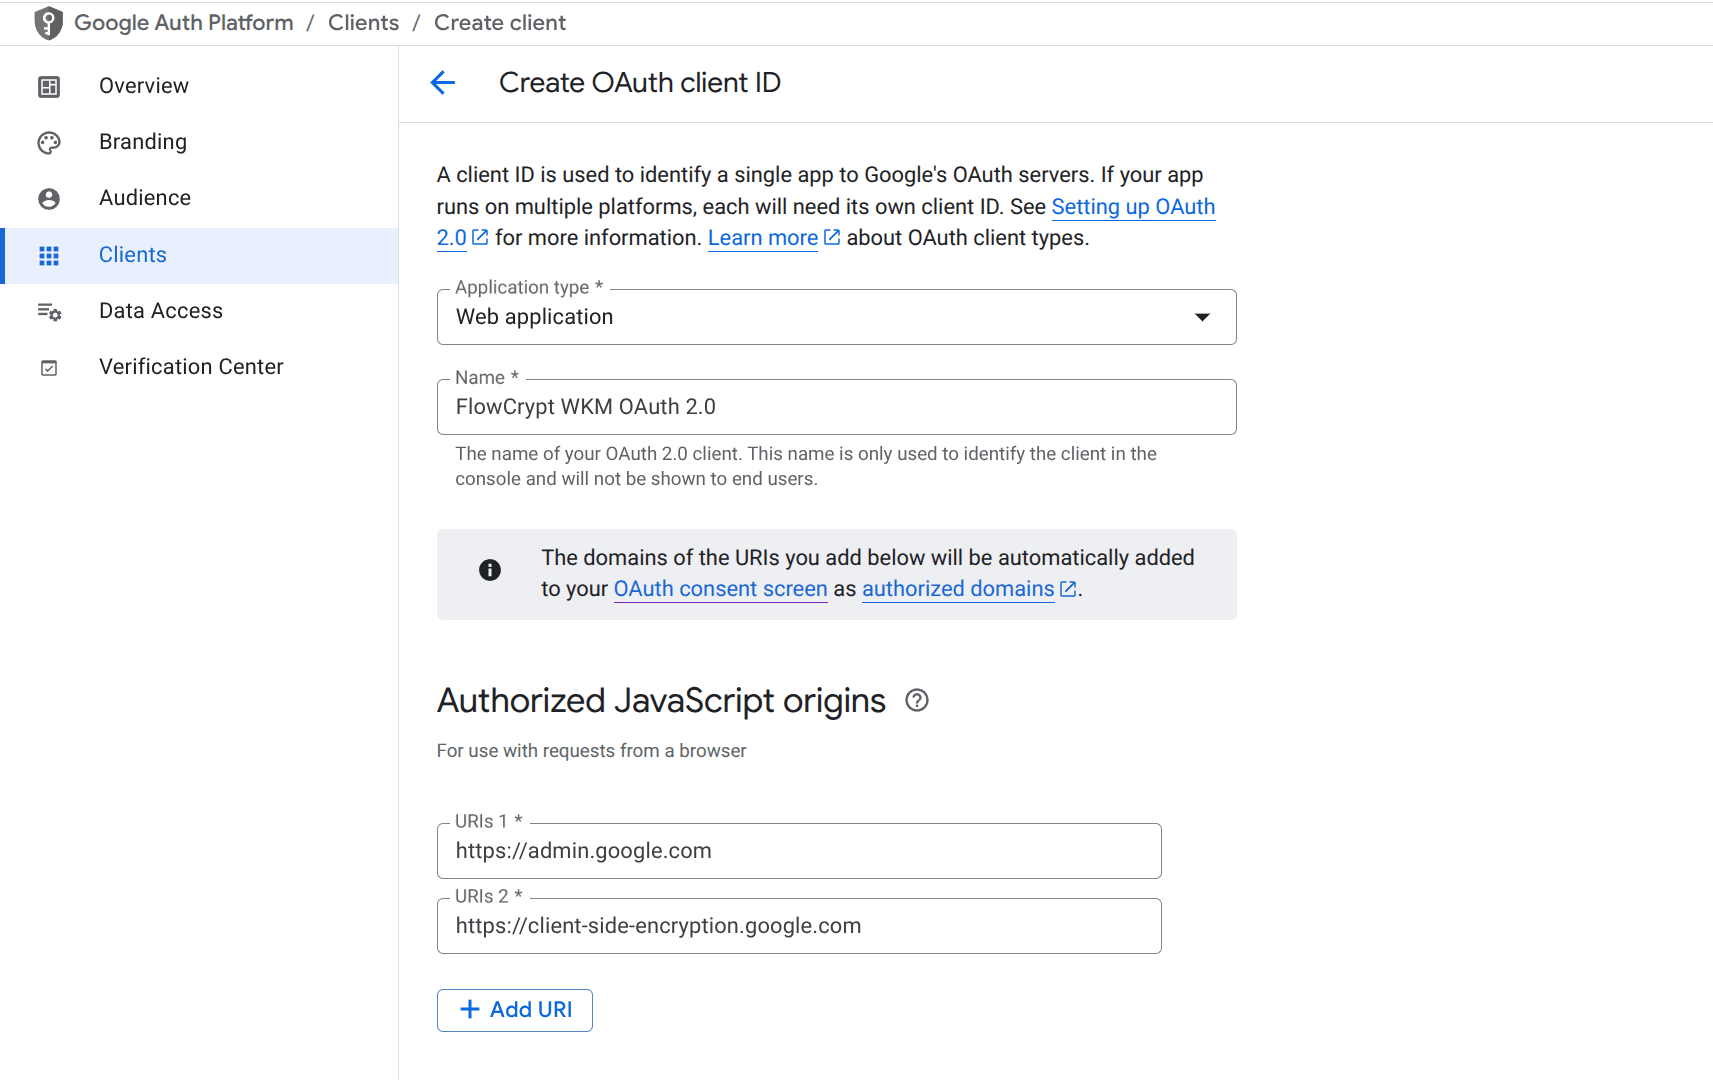
Select “Web application” as the application type.
7. Add Authorized JavaScript Origins
Under Authorized JavaScript origins, add the following:
https://admin.google.com
https://client-side-encryption.google.com
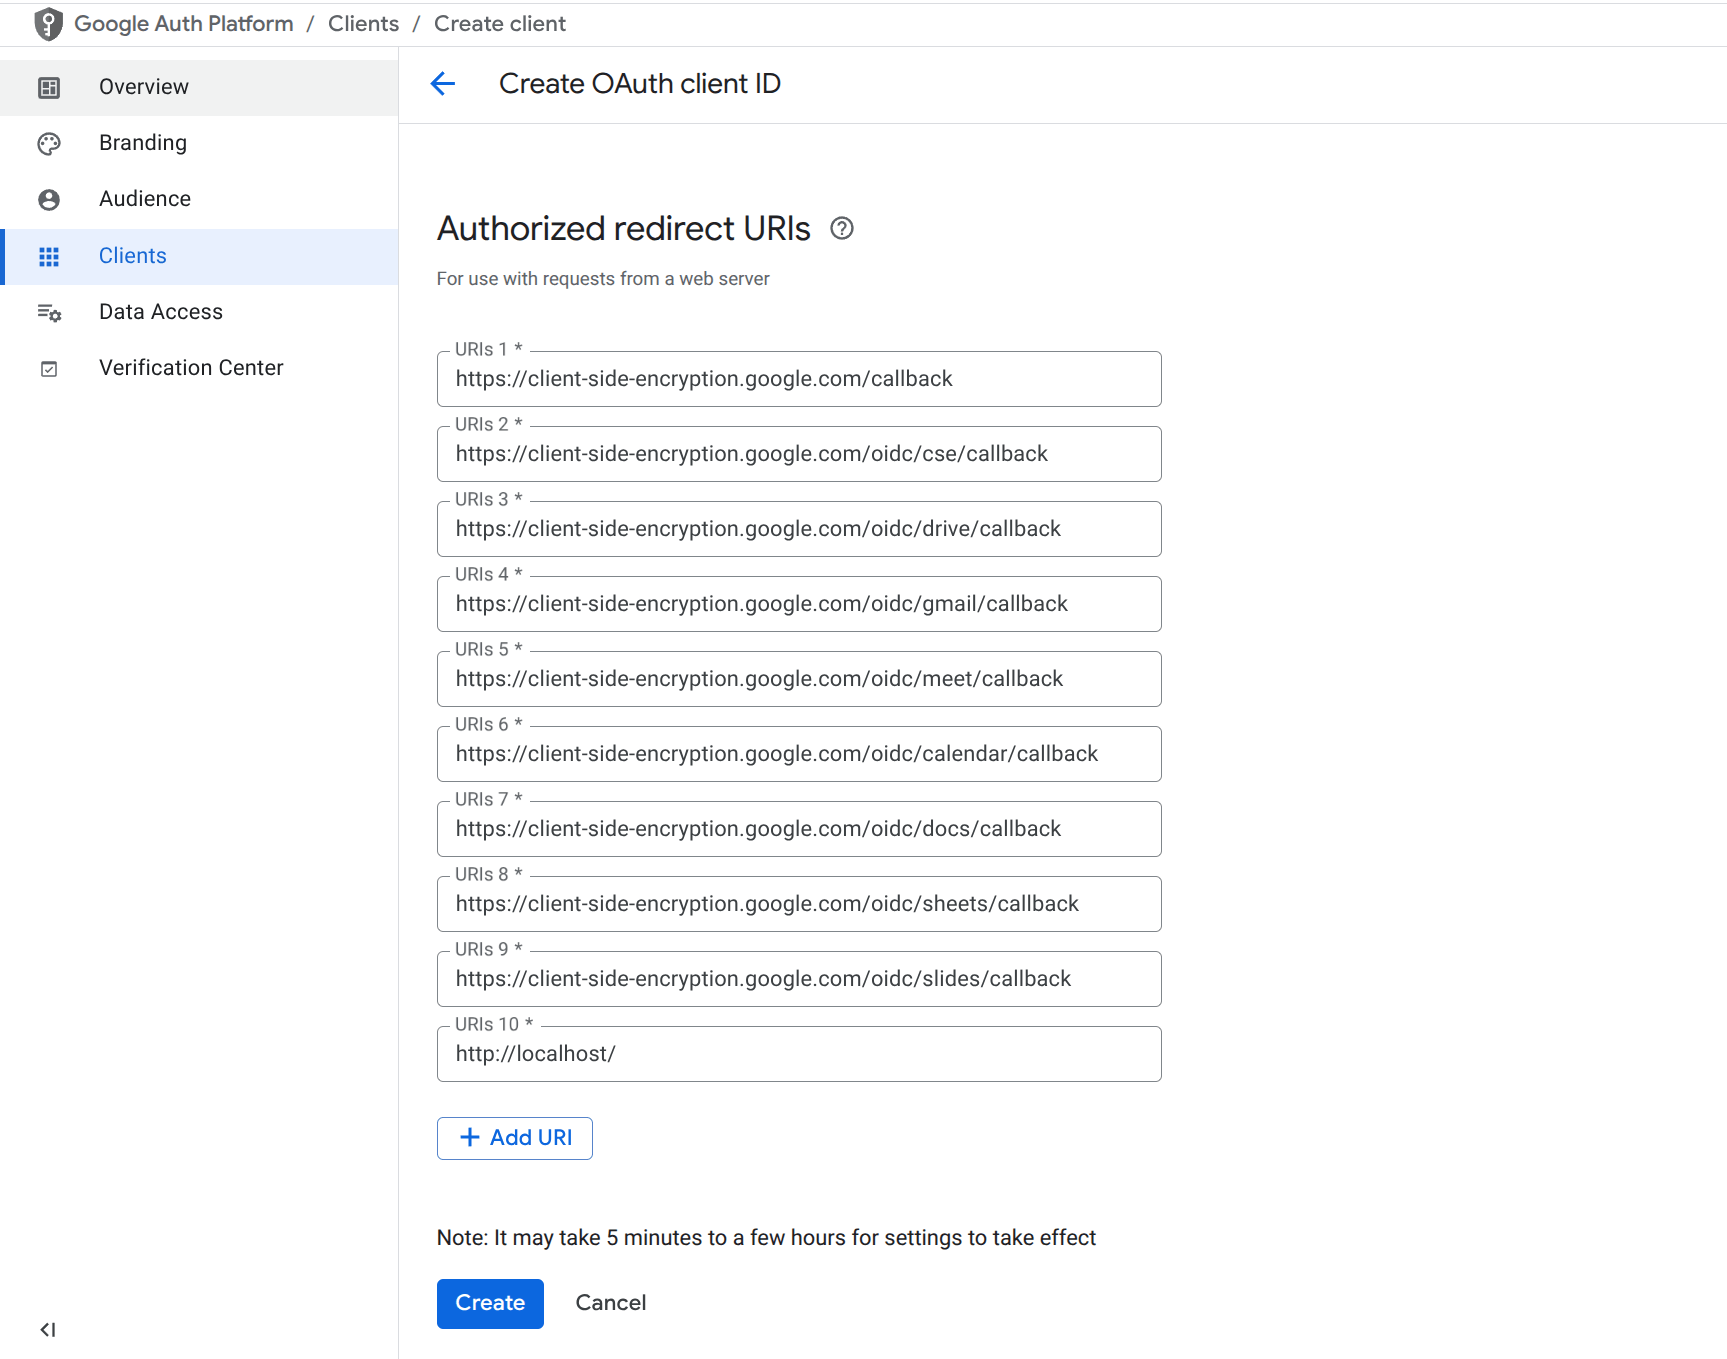
8. Add Authorized Redirect URIs
Under Authorized redirect URIs, add the following:
https://client-side-encryption.google.com/callback
https://client-side-encryption.google.com/oidc/cse/callback
https://client-side-encryption.google.com/oidc/drive/callback
https://client-side-encryption.google.com/oidc/gmail/callback
https://client-side-encryption.google.com/oidc/meet/callback
https://client-side-encryption.google.com/oidc/calendar/callback
https://client-side-encryption.google.com/oidc/docs/callback
https://client-side-encryption.google.com/oidc/sheets/callback
https://client-side-encryption.google.com/oidc/slides/callback
http://localhost/
9. Create the OAuth Client ID
Click Create to generate the client ID.
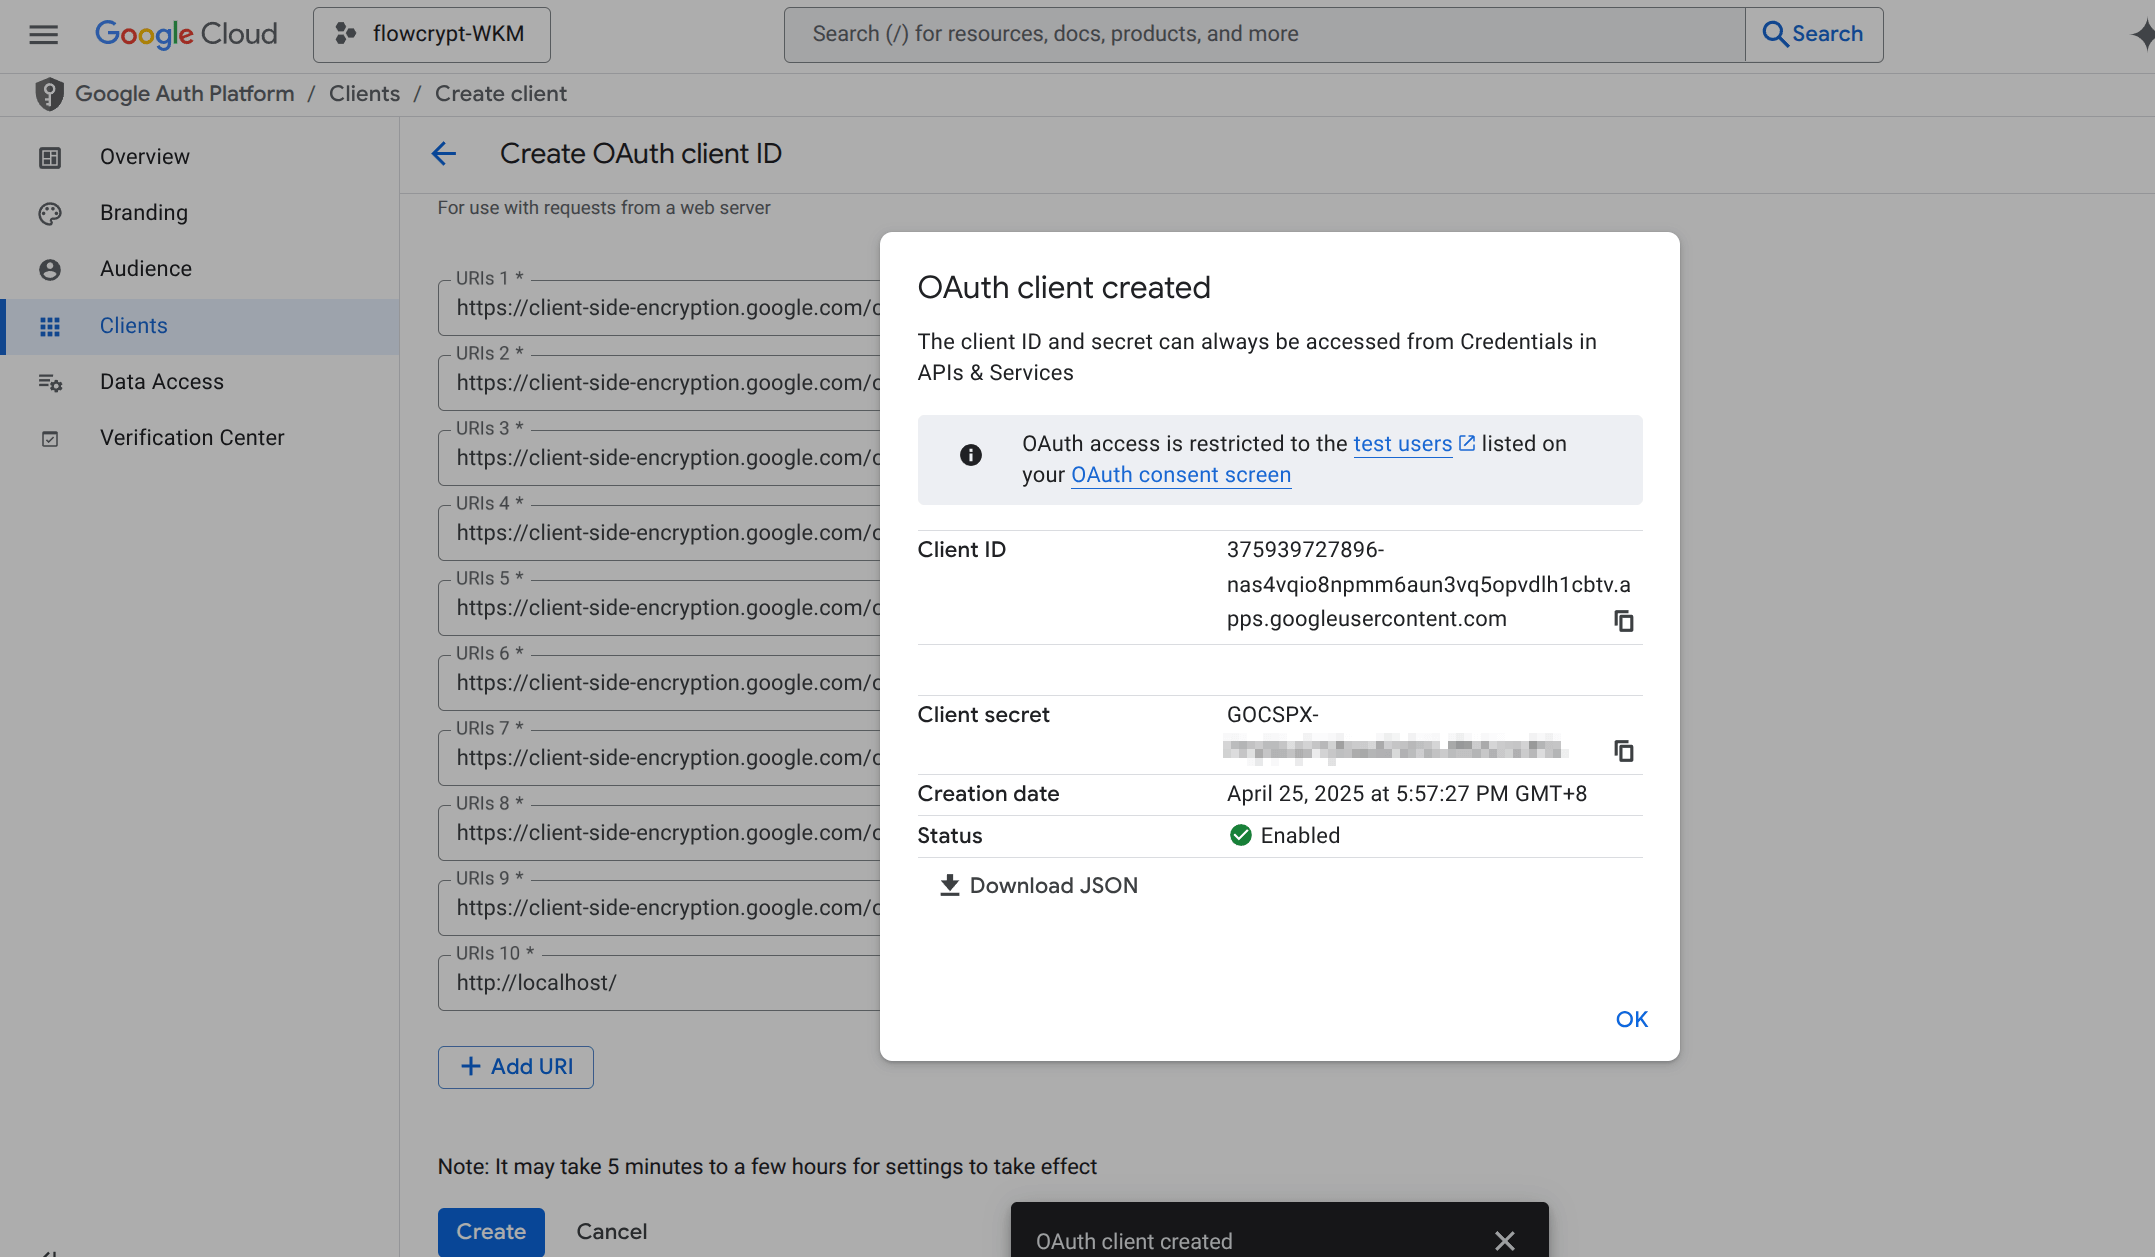
10. Copy and Share the OAuth Client ID
Copy the generated OAuth Client ID (e.g., 604563028912-xxxx.apps.googleusercontent.com) and share it with us.
11. We Configure Your WKM Instance
We will integrate the received OAuth client ID into your test WKM instance and share a Key Manager URL with you.