To use client-side encryption, you first need to enable it from the Google Workspace Admin Panel. Please follow these steps to access your Google Workspace Admin Panel and configure the app:
1. Log in to the Google Workspace Admin Console.
2. Add the external key service URL in the Google Workspace Admin Console ⮕ Data ⮕ Compliance ⮕ Client-side encryption ⮕ External key service ⮕ Add.
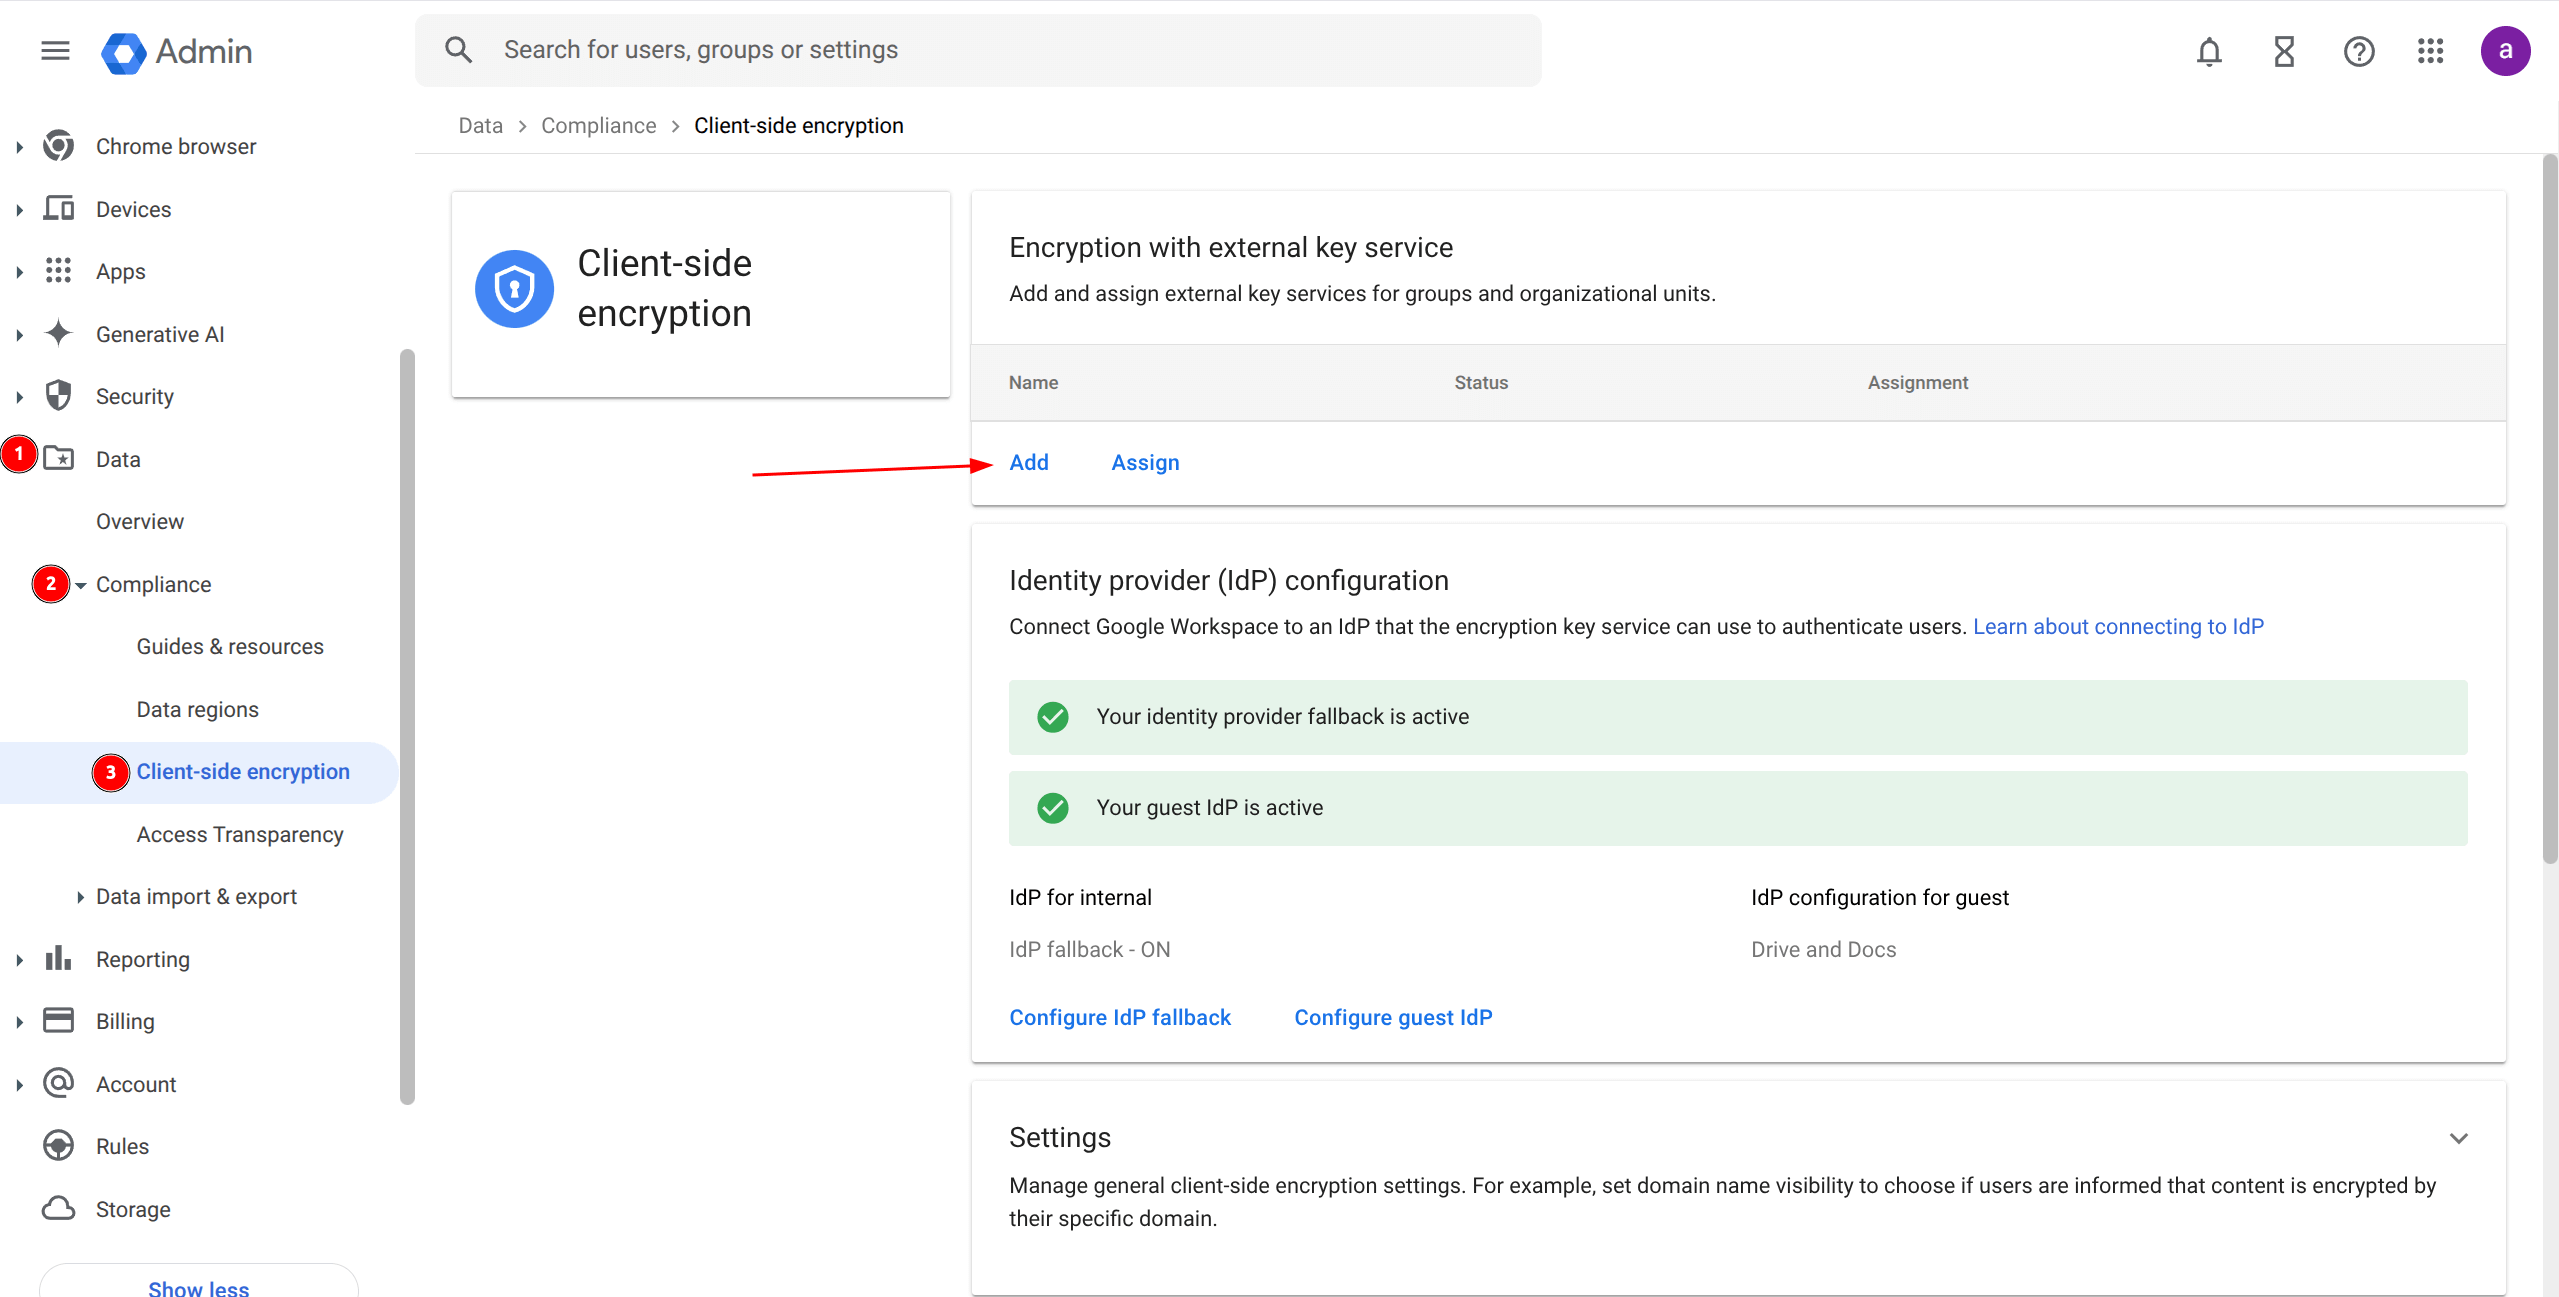
3. Add the Key Manager URL received from us and name it FlowCrypt Workspace Key Manager, finally click Add Service.
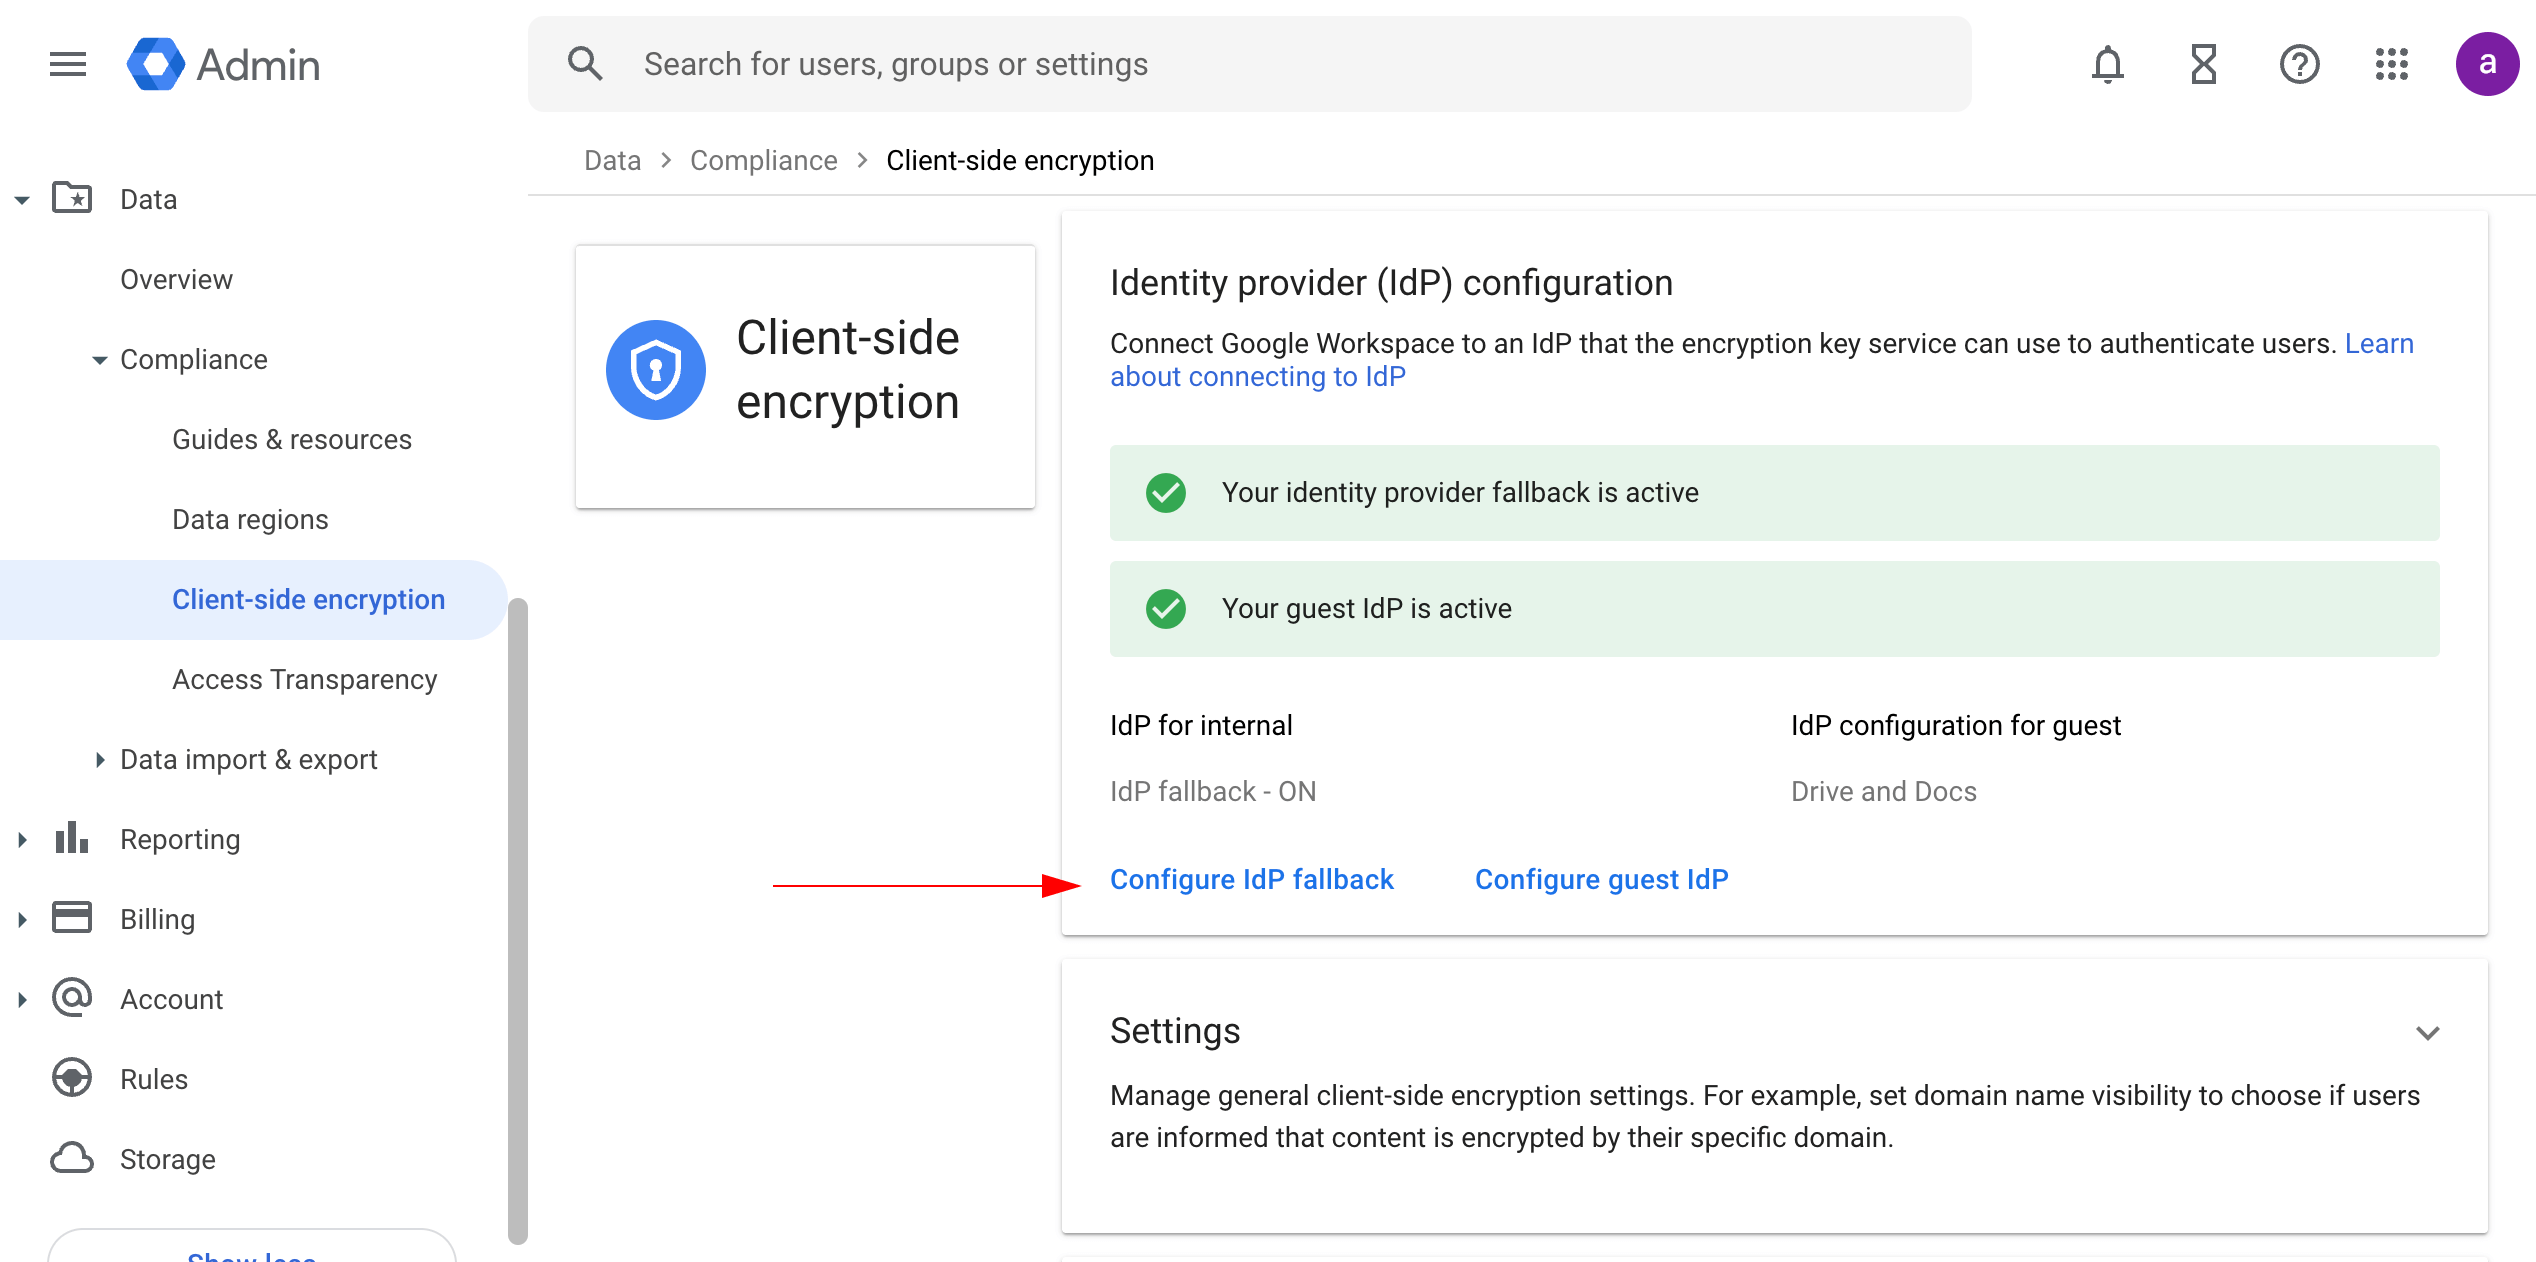
4. To connect Google Workspace to an identity provider (IdP), go to the Identity Provider (IdP) Configuration section and click Configure IdP Fallback.
5. Enter the following information about your IdP:
-
Name:
[Your IdP Name] -
Client ID:
[Your IdP Client ID] -
Discovery URI:
[Your IdP Discovery URI] - Grant Type: Implicit
Note: The Client ID and Discovery URI values vary depending on your chosen Identity Provider. For example:
- Google IdP: Client ID format is
xxx.apps.googleusercontent.comwith Discovery URIhttps://accounts.google.com/.well-known/openid-configuration- Other providers: Consult your IdP documentation for the correct format
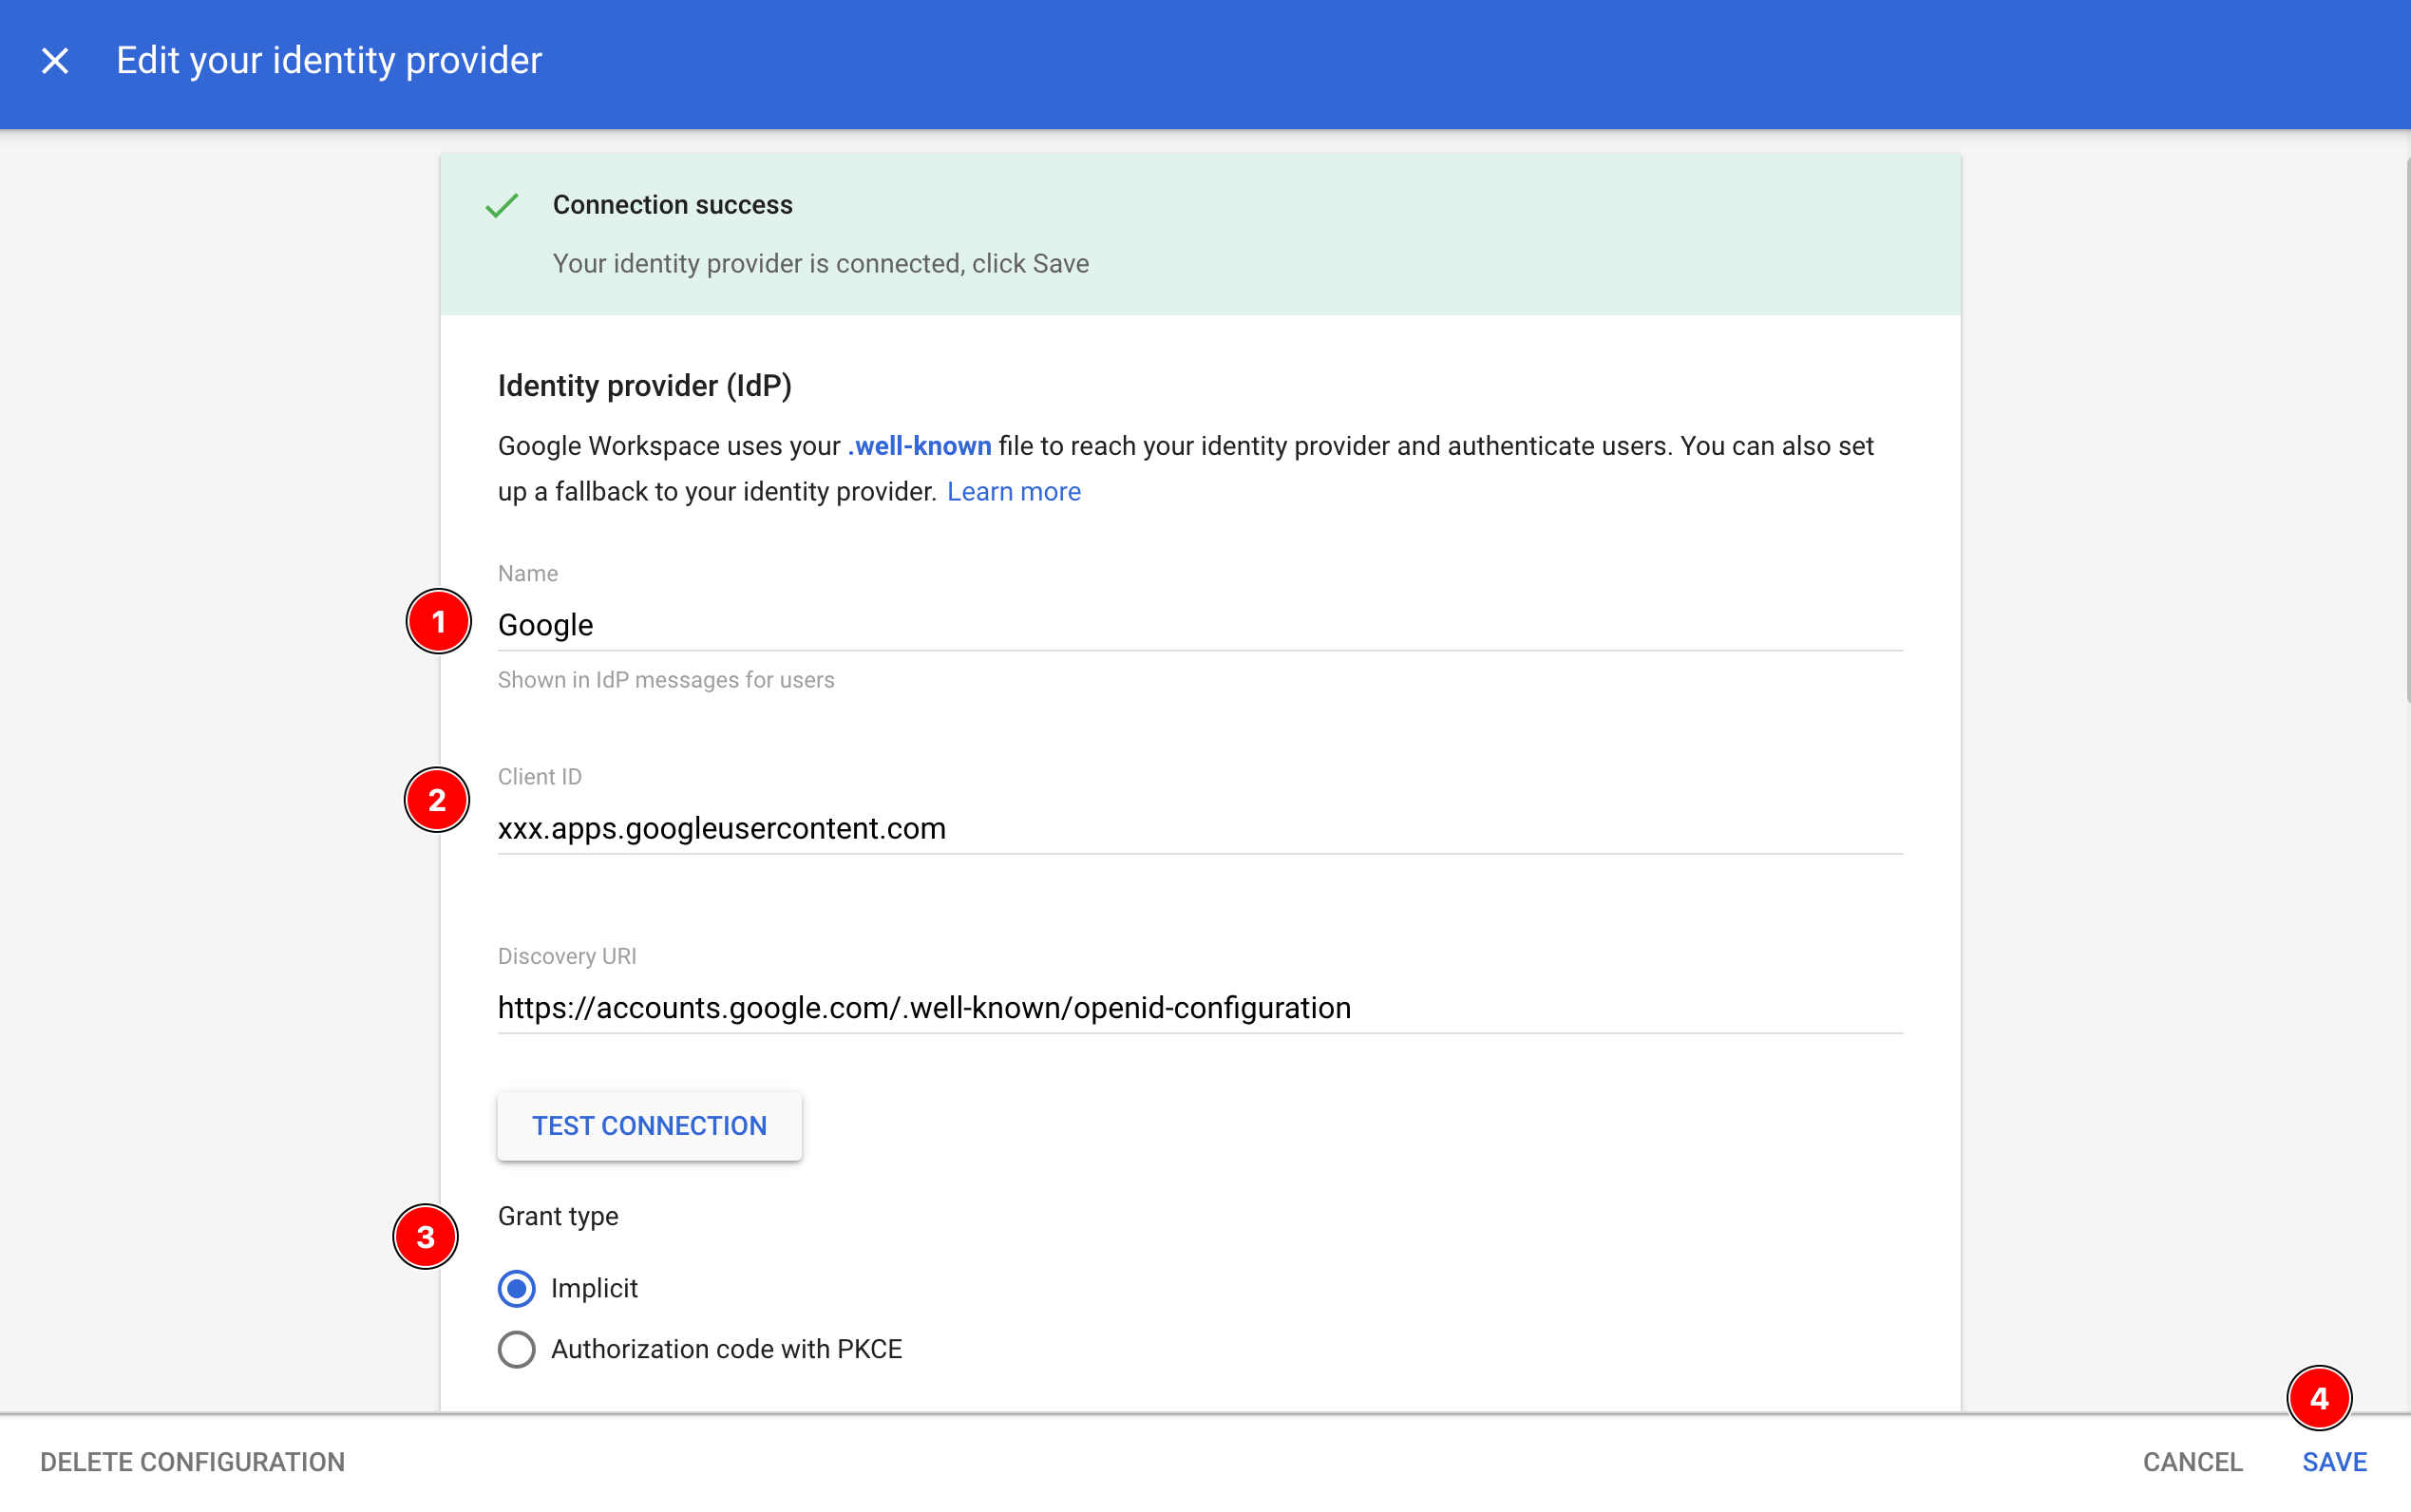
6. Click the Save button at the bottom of the configuration form to apply your changes.
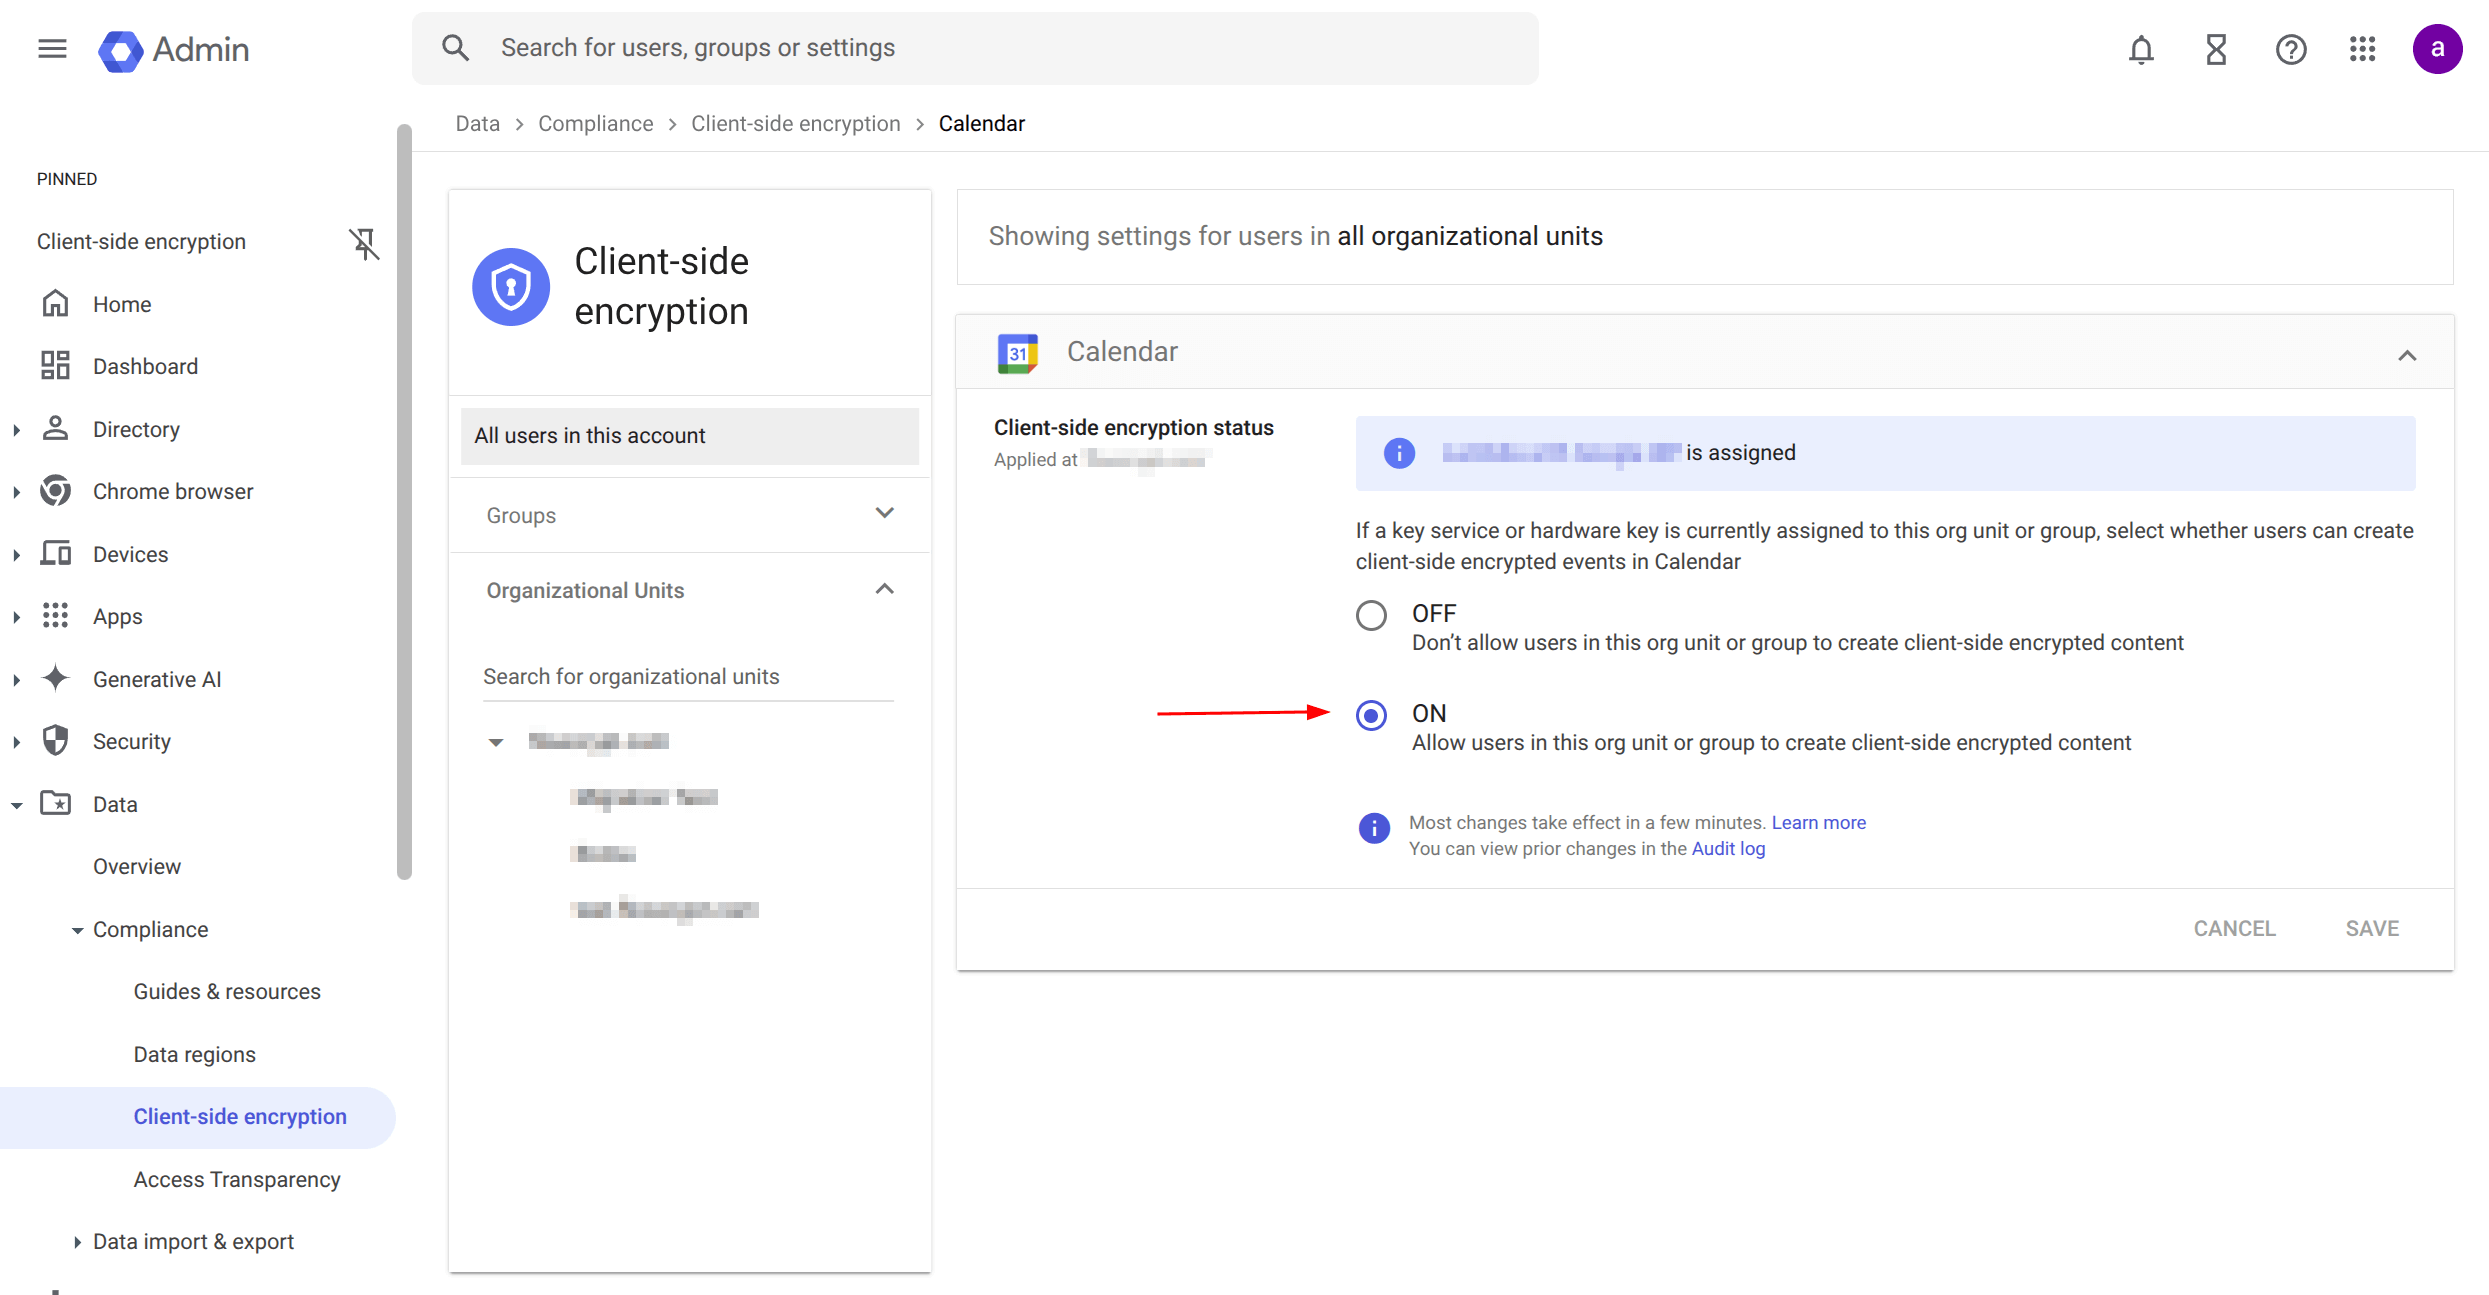
7. Enable the encryption per Google Apps through the Google Workspace Admin Console ⮕ Data ⮕ Compliance ⮕ Client-side encryption ⮕ scroll down until you reach the Apps section.
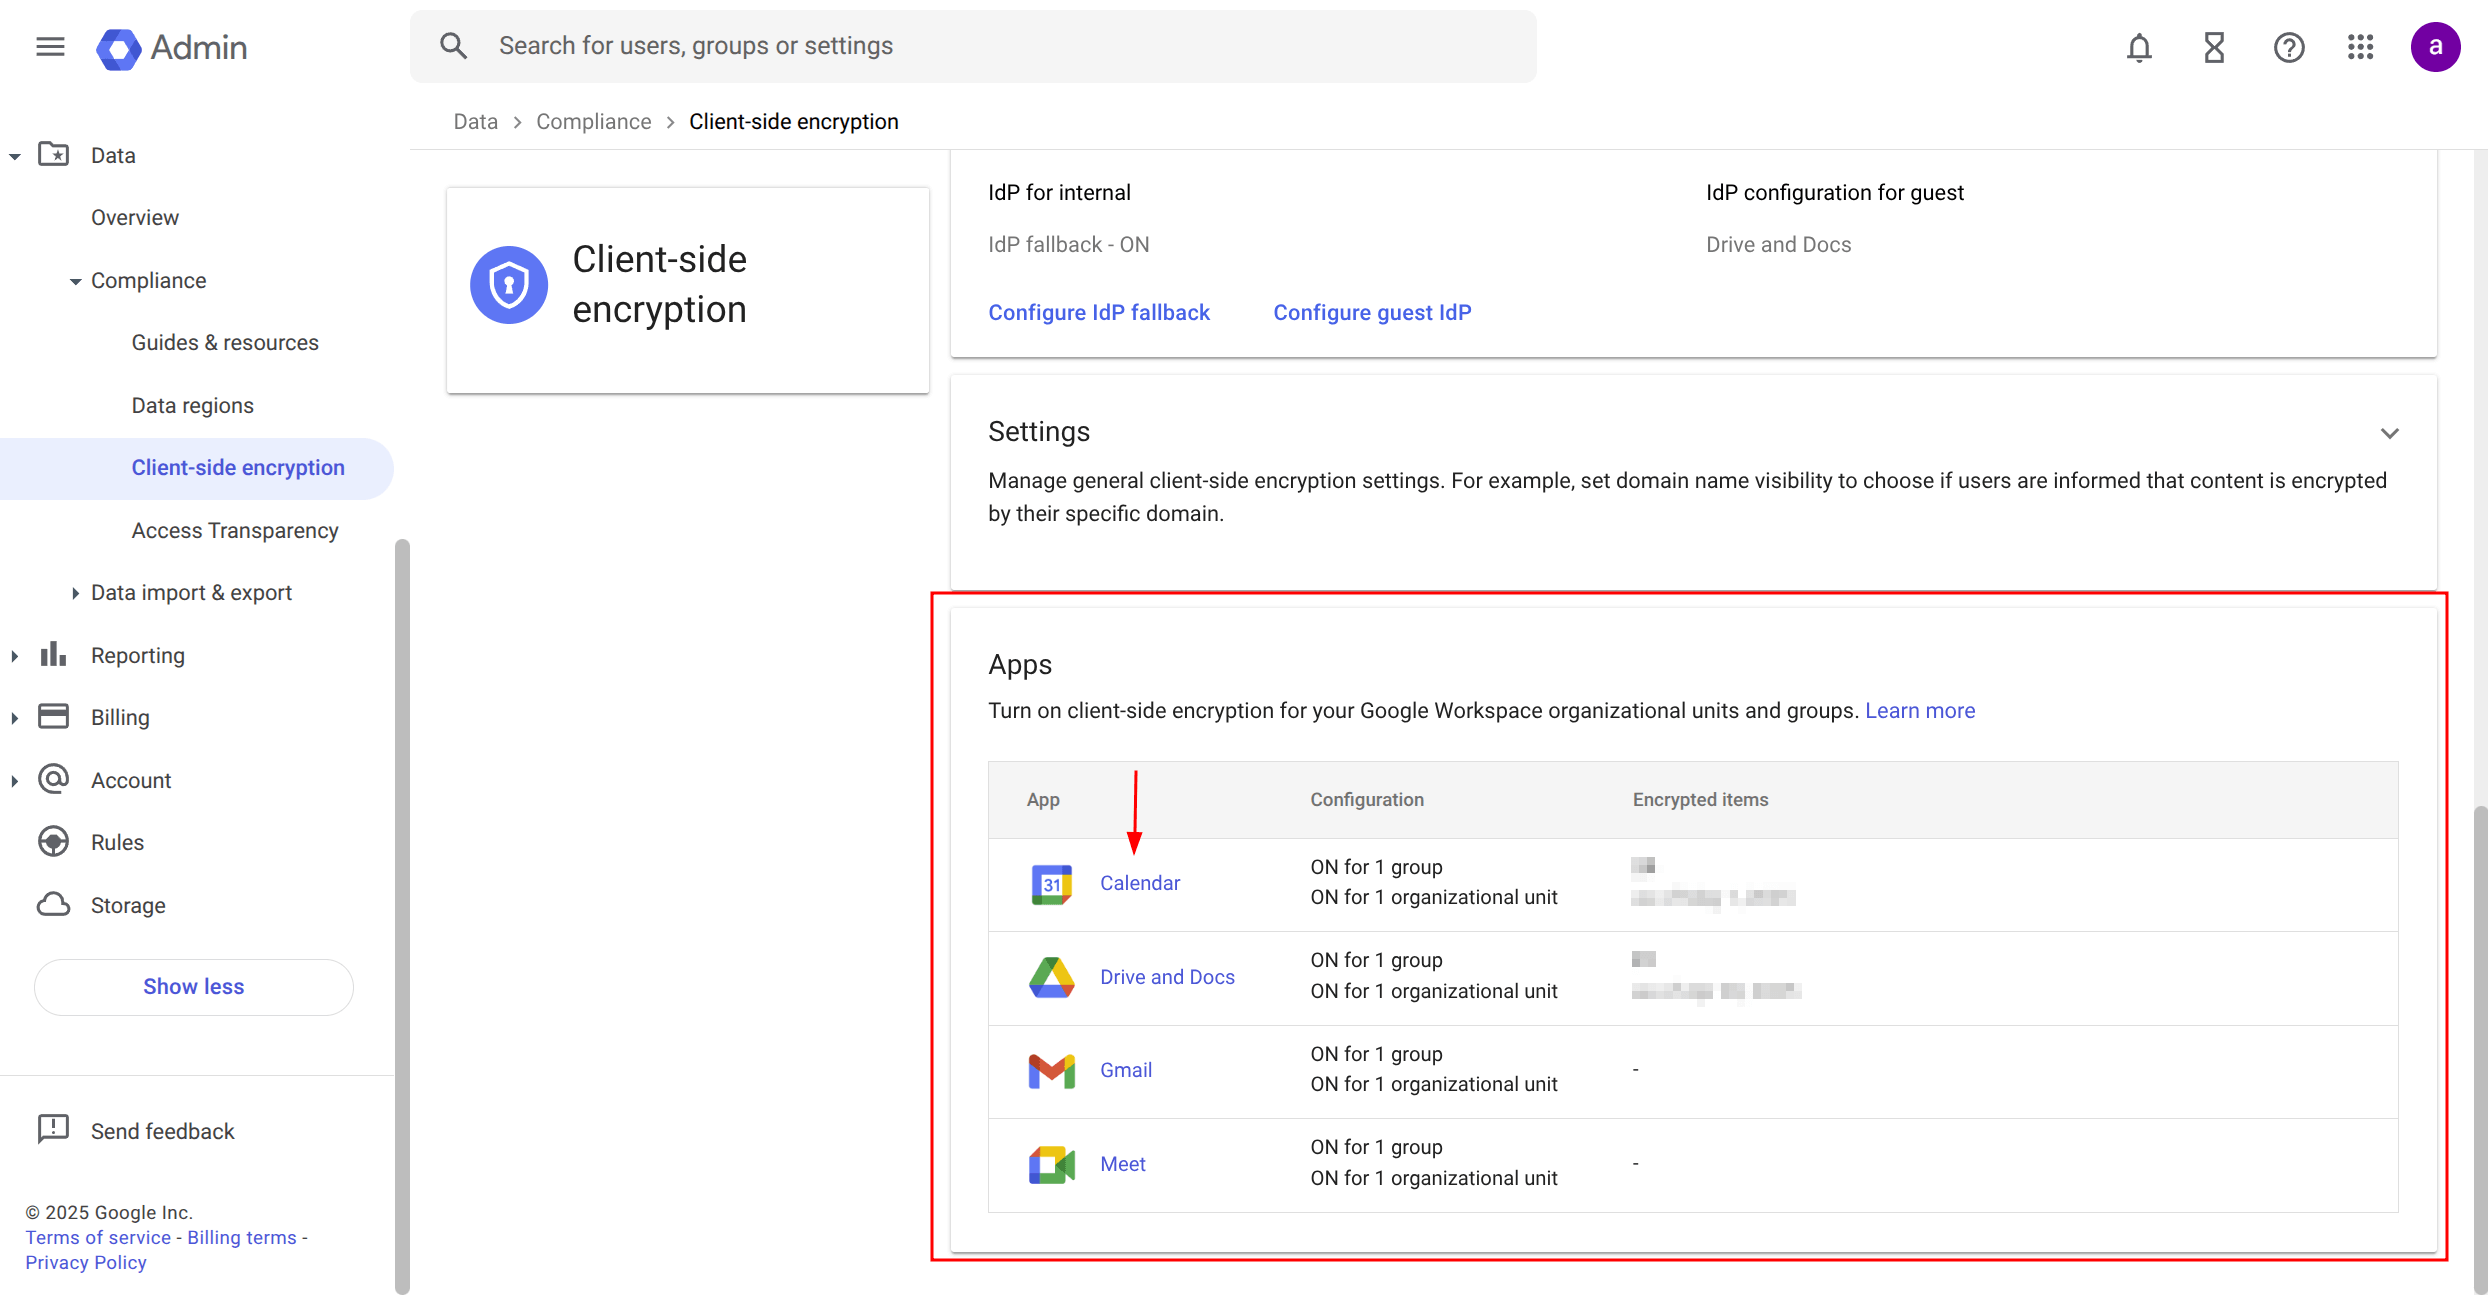
8. Choose the Google app(s) for which you want to enable encryption.
How to encrypt files and folders while uploading to Google Drive
On Google Drive, you can encrypt single files using the File upload option as well as folders using the Folder upload option.
How to encrypt files
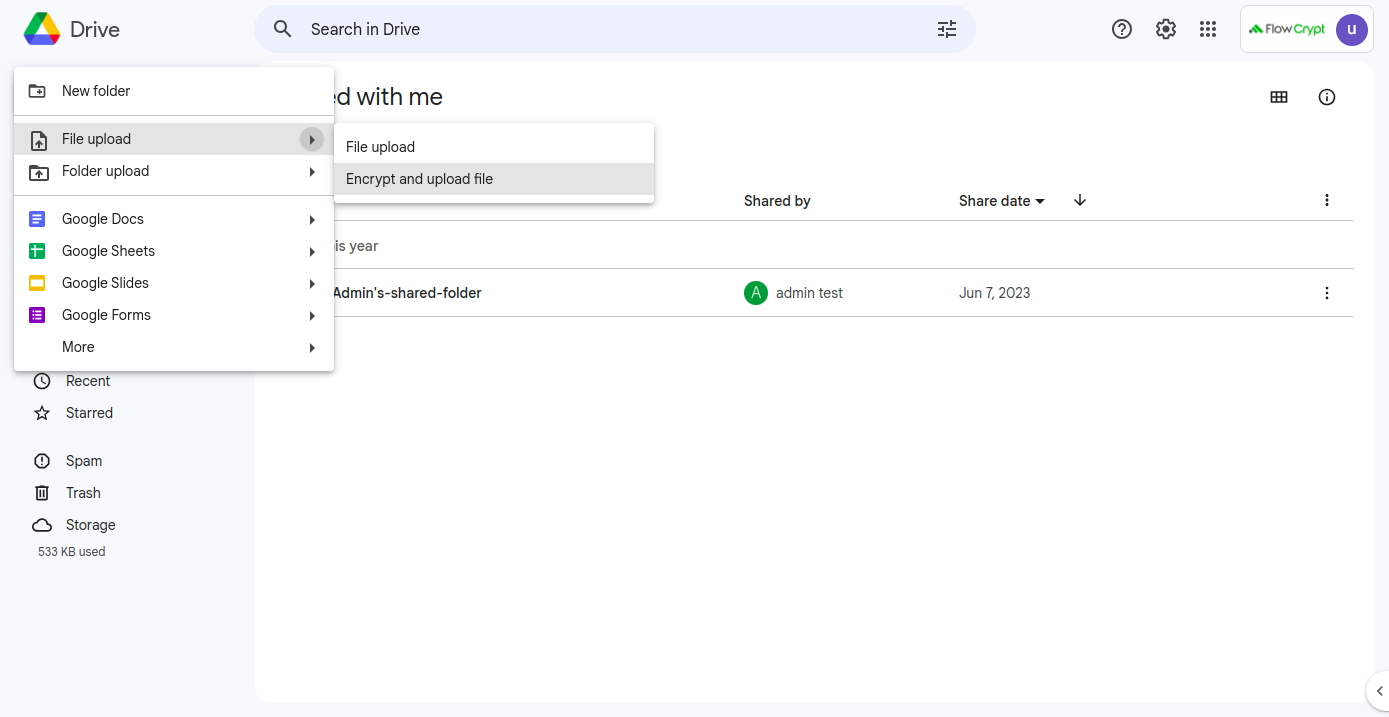
1. Log in to drive.google.com, then click on New ⮕ File upload ⮕ Hover over the triangle right arrow icon and click Encrypt and upload file:
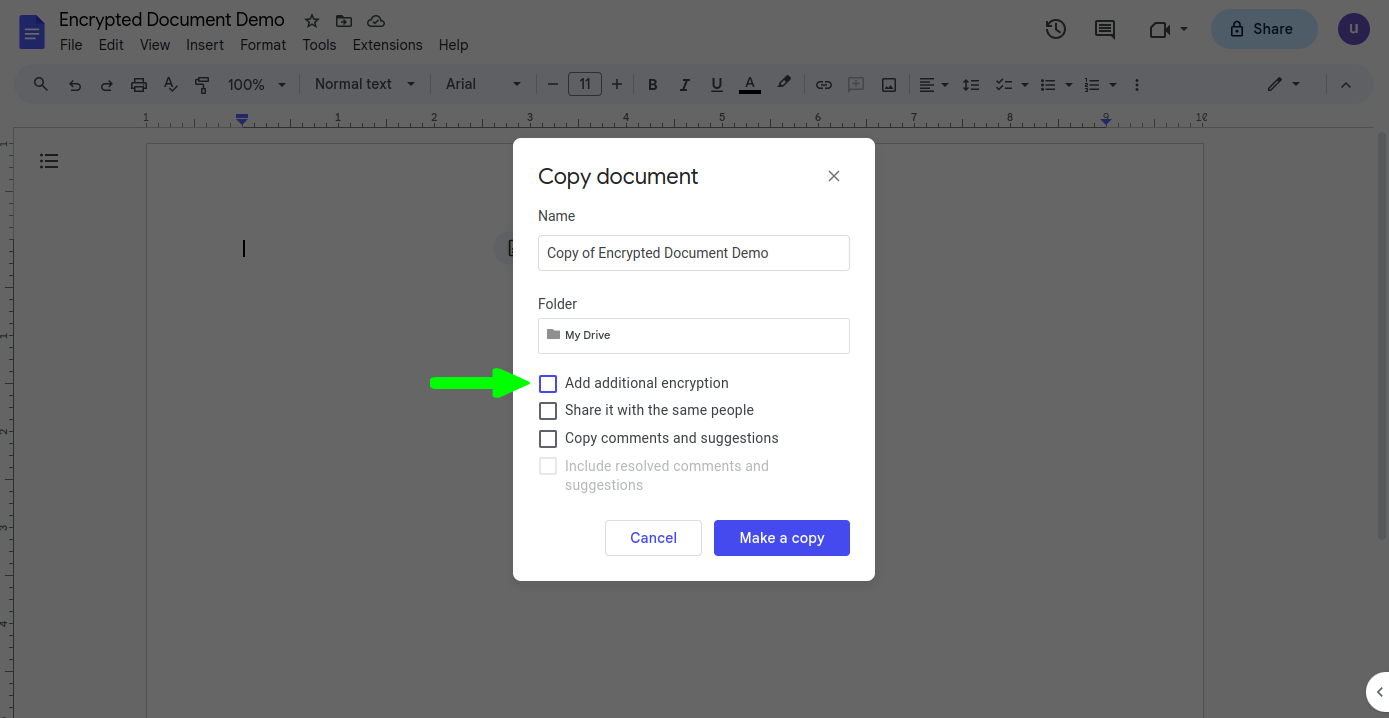
You can also create encrypted copies of files that have already been uploaded without encryption. To do so, open the file, open the File section in the top navbar ⮕ click on Make a copy ⮕ tick the Add additional encryption checkbox ⮕ click Make a copy:
How to encrypt folders
1. Log in to drive.google.com, then click on New ⮕ Folder upload ⮕ Hover over the triangle right arrow icon and click Encrypt and upload folder:
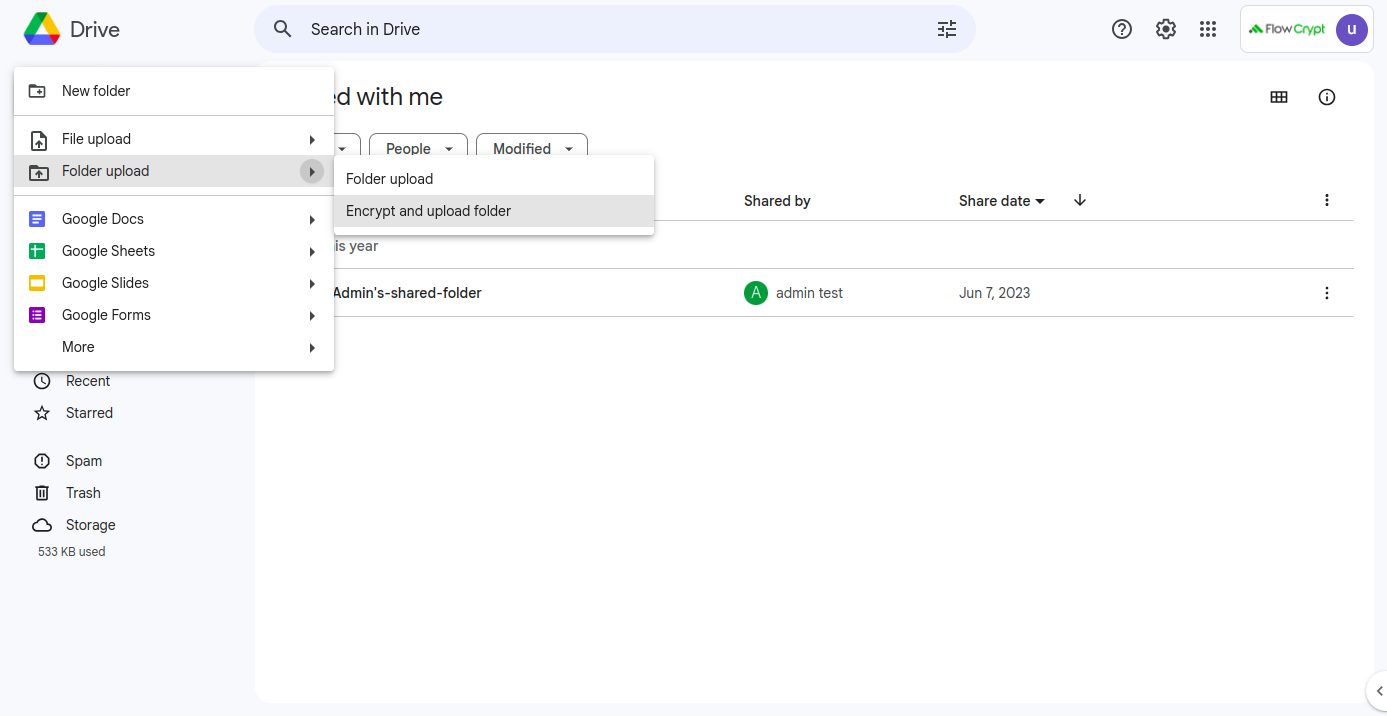
Note that in this case, you’re encrypting the files inside the folder, not the folder itself.
How to create encrypted Google Docs, Sheets, and Slides files
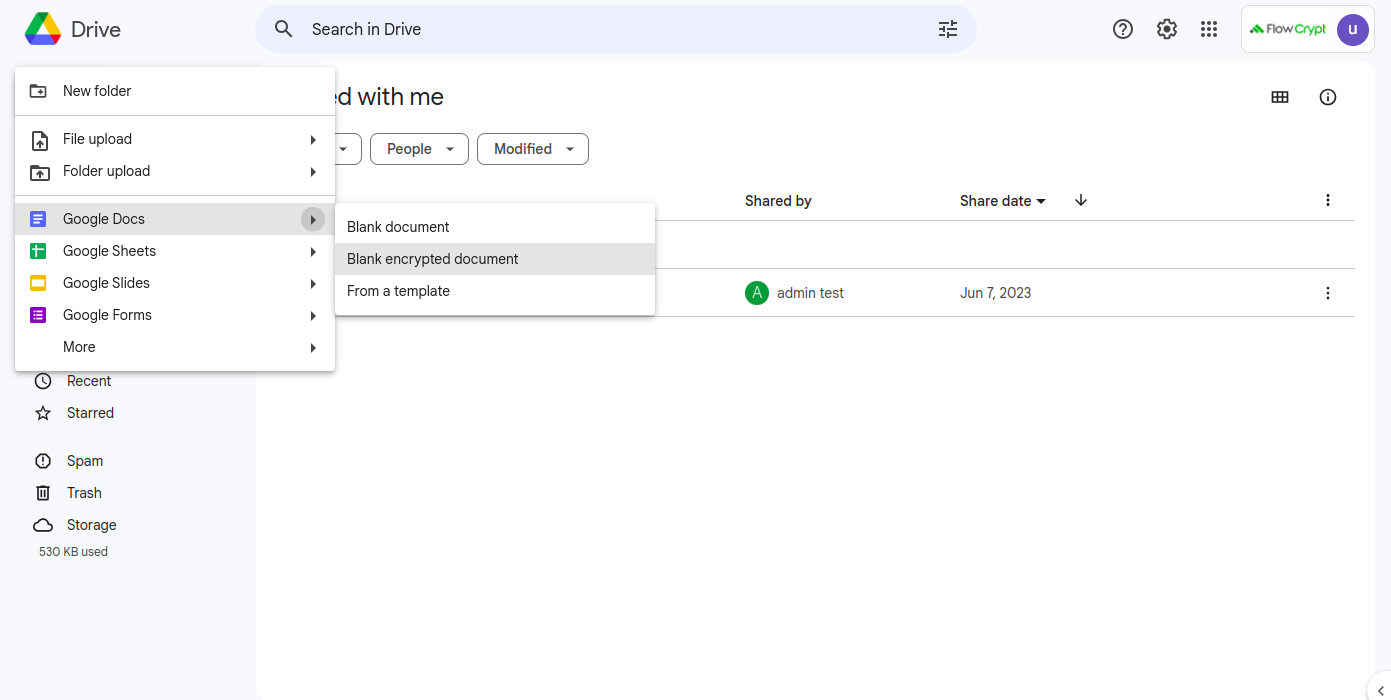
1. Log in to drive.google.com, then click on New ⮕ Google Docs ⮕ Hover over the triangle right arrow icon and click Blank encrypted document:
2. It will create a new encrypted file:
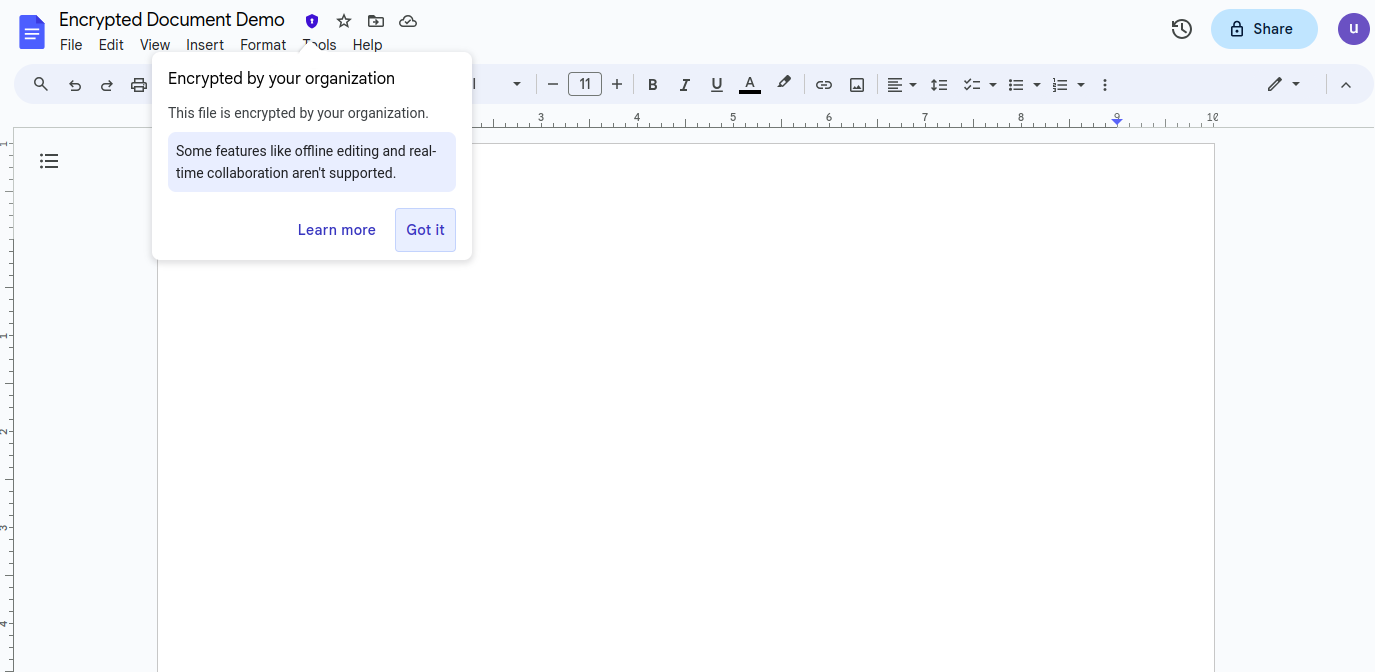
Similarly, you can create encrypted Google Sheets and Slides files on your drive.
How to create an encrypted Calendar event
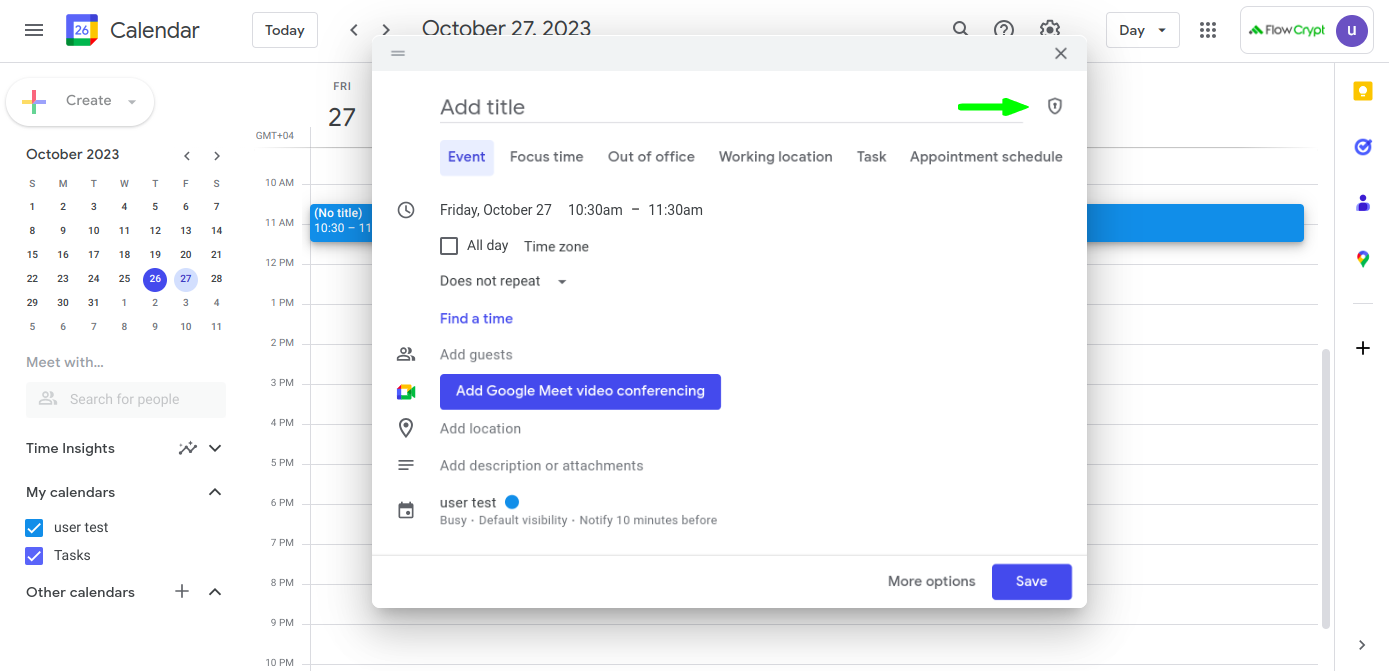
1. Log in to calendar.google.com ⮕ choose a preferred date ⮕ then click Create ⮕ choose Event to set it up. Here, you’ll see a shield icon that you need to click:
2. You can determine that the event information is encrypted if you see a notification badge and a message that says “Encryption is added”:
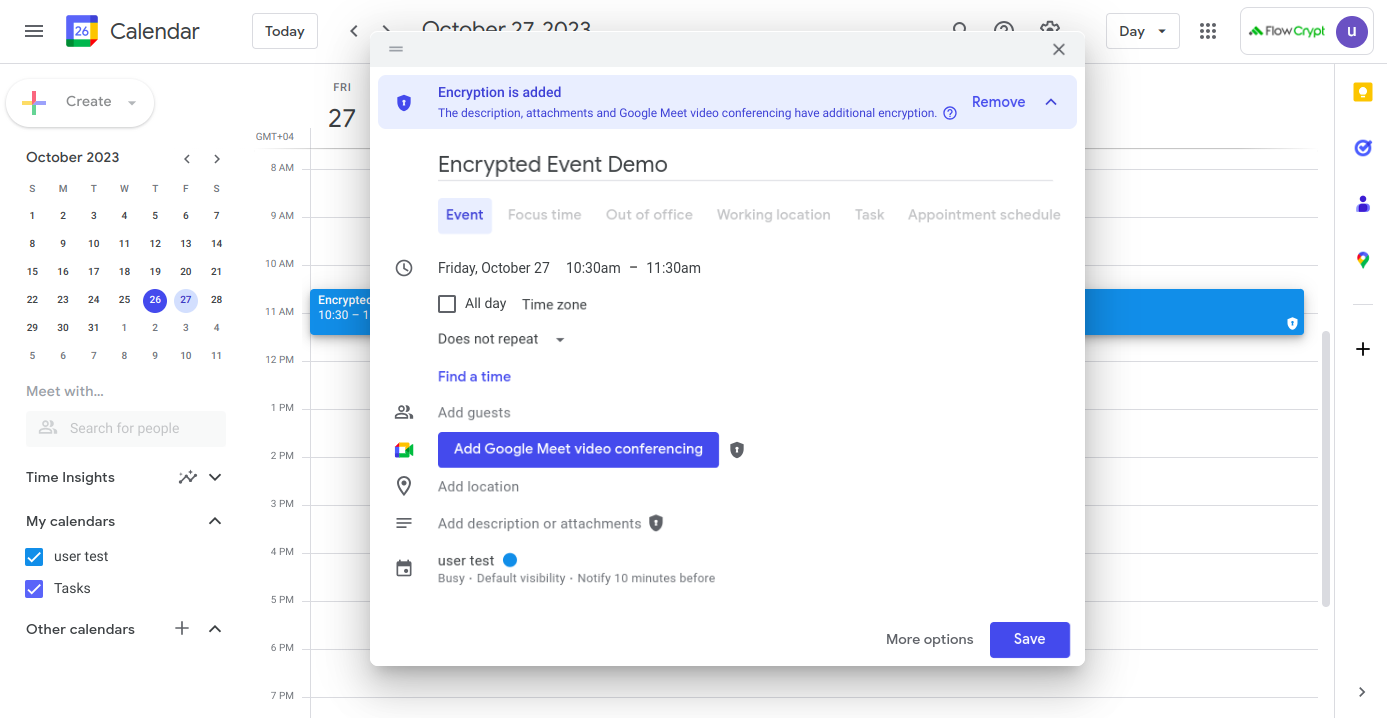
Additionally, this event will have an encrypted video conferencing option with Meet, as well as encrypted description and attachment options.
How to create an encrypted Meet video call
1. Log in to calendar.google.com ⮕ click New Meeting ⮕ then click Video call options:
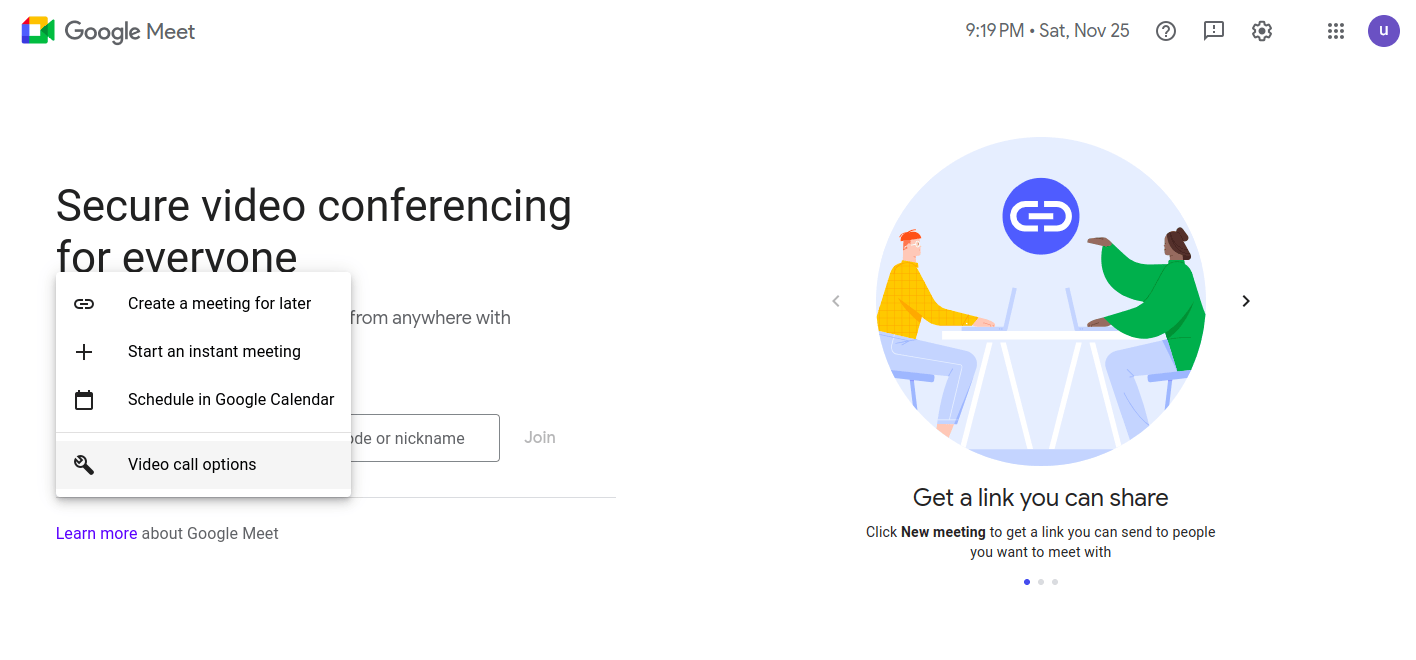
In the modal window, tick the Add encryption option:
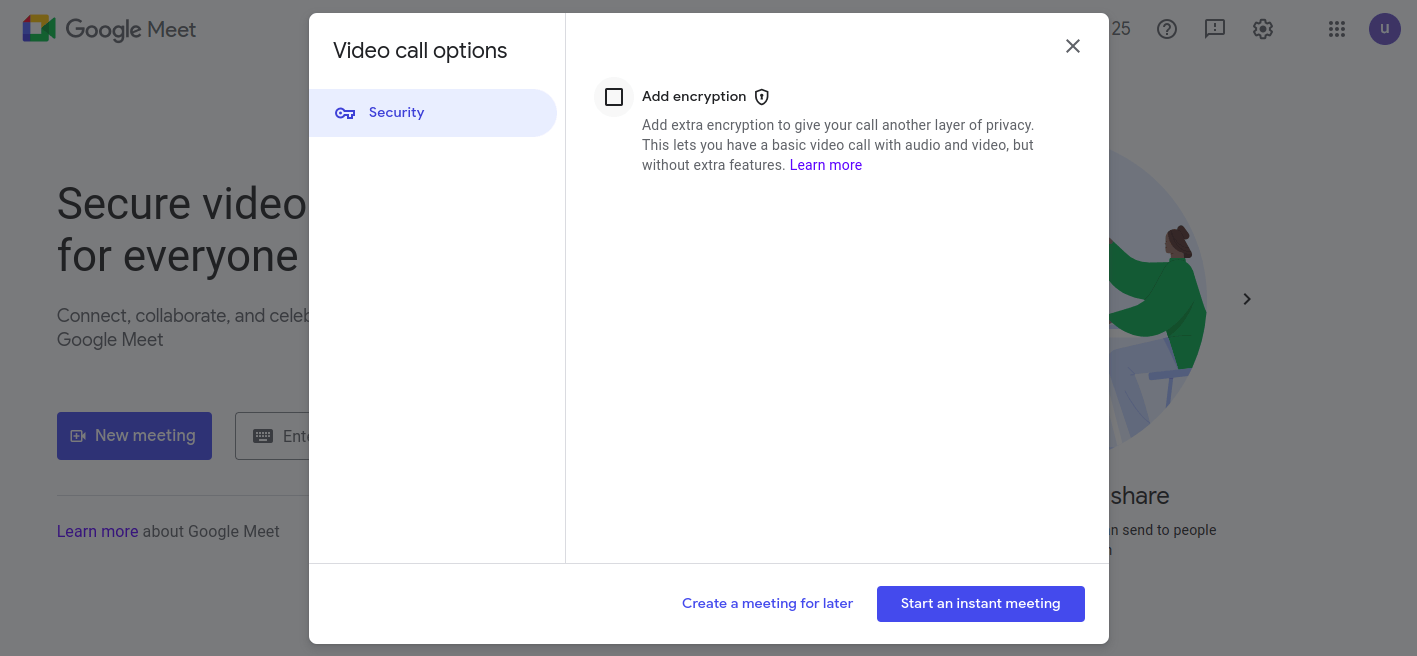
Both the Create a meeting for later and Start an instant meeting options will now have client-side encryption.